Heroku Application Development: The Underrated Star For Devs

If Heroku were a person, it’d be that genius friend who’s always five steps ahead, casually solving complex problems while the rest of us are still figuring out where to start. Sure, you’ve heard about Heroku, maybe you even know what it does (kind of) and have heard about Heroku Application Development. 

But do you really know why it’s the real deal? 

Let’s dive into why Heroku application development is the secret sauce your tech company has been looking for, all with a dash of humor, and some solid examples.

What Makes Heroku Application Development Useful?

Let’s address the elephant in the room: Yes, Heroku is a Platform as a Service (PaaS). But if that phrase makes your eyes glaze over, here’s the TL;DR: Heroku takes your application code and makes it production ready with fewer headaches than a well-written JavaScript function.

Think of it as the IKEA of cloud application deployment. Sure, you could hand-build your app’s infrastructure in AWS or Google Cloud. But do you really want to? Heroku Application Development gives you the flat-pack furniture equivalent: prem assembled, efficient and extremely good looking.

Case Study: Slack

You know Slack, the thing you spend 90% of your workday on? It started on Heroku. In its early days, Slack relied on Heroku’s simplicity and scalability to focus on perfecting its app, not wrangling servers.

By the time Slack became the workplace sensation it is today, Heroku had done its job—letting them scale and migrate seamlessly when the time came.

heroku application development

Why Developers Actually Love Heroku (Yes, Love)

Developers don’t typically gush about platforms. They usually have a thing or two they would change. Yet Heroku has managed to inspire affection and borderline devotion among its users. Why? Because it takes care of the grunt work so you can focus on building things people care about.

1. Deployment: One Fast Push, and You’re Done with Heroku Application Development

Heroku’s deployment process is so simple, it almost feels wrong. Push your code to a Git repository, and Heroku does the rest. No messing with configurations. No late-night calls to your DevOps team. Just push and watch the magic happen.

Example: A FinTech Startup’s MVP

Picture this: A fledgling FinTech startup wants to launch a minimum viable product (MVP) fast. They could spend weeks setting up AWS or Azure, or they could deploy on Heroku in a single afternoon.

They go with Heroku, spend the time saved on refining their app’s features and attract their first big investor. Efficiency pays off, literally.

2. Add-Ons: Your App’s Swiss Army Knife

Heroku’s add ons marketplace is the tech equivalent of a candy store, offering integrations for everything from databases (PostgreSQL, anyone?) to analytics tools. Need Redis for caching? Done. Want New Relic for performance monitoring? Easy.

Example: An E-Commerce Platform

An e-commerce startup on Heroku uses the ClearDB add-on for MySQL and the Papertrail add-on for log management. They track performance with New Relic and send real-time updates via a Twilio integration. In less than a week, they’ve built a fully functional platform with all the bells and whistles—no backend panic attacks required.

Scaling: Heroku Doesn’t Break a Sweat

Ah, scalability. The Achilles’ heel of many promising apps. Heroku handles scaling with something it calls “dynos.” Don’t let the name scare you; it’s basically a fancy term for virtualized containers. Need more capacity? Just spin up more dynos. It’s so smooth, you might forget scaling was supposed to be stressful.

Case Study: The Election Data Tracker

During the 2020 U.S. election, a data visualization app was needed to handle massive traffic spikes as millions of people checked real-time results. Hosting on Heroku allowed them to scale dynamically, adding dynos on the fly without crashing under the load. Try pulling that off with a homemade server setup.

But Is Heroku Too Simple for Serious Tech?

Critics sometimes claim Heroku is “just for startups” or “too expensive for large-scale use.” Let’s unpack that.

Sure, Heroku isn’t designed for managing 100,000 microservices in a hyperscale environment (looking at you, Kubernetes). But for 99% of applications, its simplicity saves time and money in the long run.

Example: SaaS Company Migration

A mid-sized SaaS company ran their app on Heroku for five years, during which they grew from 10 to 200 employees. When they outgrew Heroku’s capacity, the transition to AWS was straightforward — thanks to the groundwork Heroku had laid. No regrets, just growth.

Who Should Use Heroku?

1. Startups

When it comes to rapid deployment and prototyping, Heroku is a no-brainer. Its user-friendly platform allows you to quickly build, test and deploy applications with minimal setup and configuration, making it ideal for projects that require fast iteration and quick go-to-market timelines.

2. Small to Mid-Sized Teams:

If you don’t have a dedicated DevOps team (or if your current team is perpetually swamped with tasks), Heroku is the perfect solution to keep things moving smoothly. Its powerful platform simplifies deployment, monitoring, and scaling, allowing your team to focus on development rather than infrastructure management.

3. Enterprise Experiments:

Big companies can leverage Heroku for a variety of purposes, from side projects and proof-of-concepts to internal tools. Heroku’s flexibility and ease of use make it an ideal platform for quickly bringing ideas to life without the complexity of managing infrastructure. 

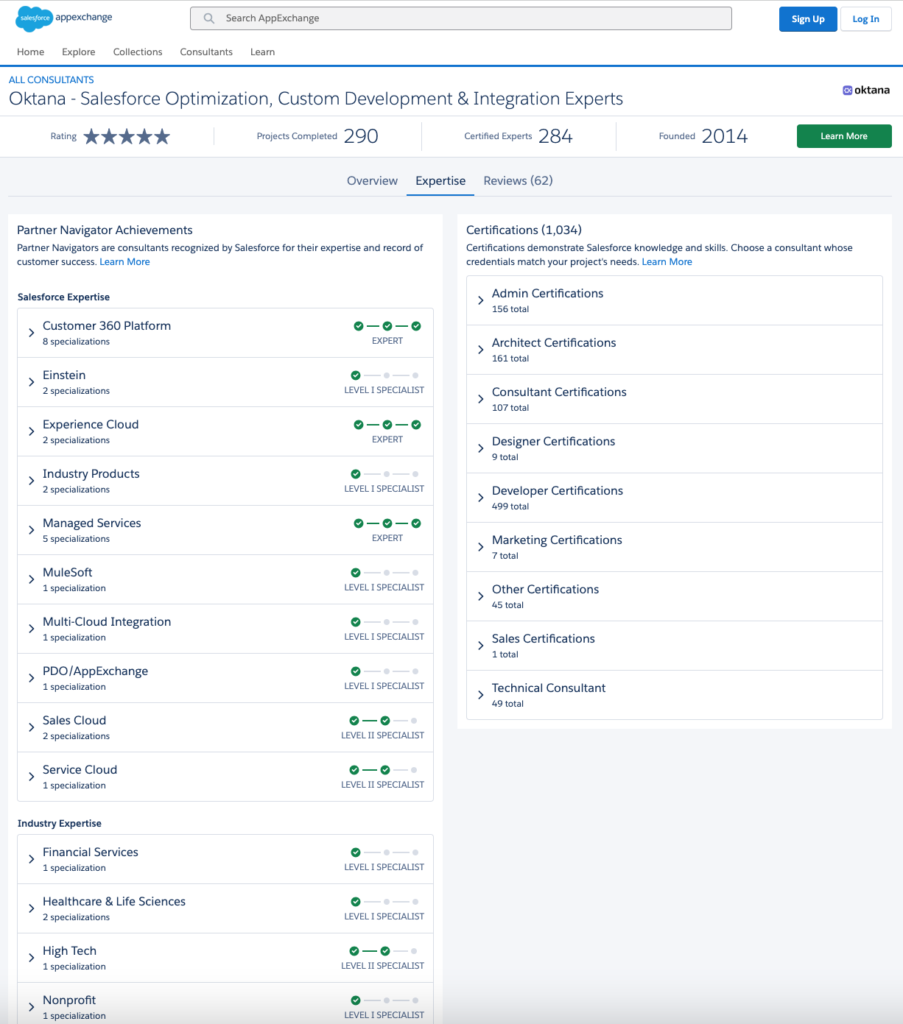
But Wait, What About Oktana?

If you’re sold on Heroku’s application development potential but wondering how to wield it like a pro, that’s where Oktana comes in. Whether you’re deploying your first app or optimizing a complex architecture, we bring the expertise to make Heroku work for your specific needs.

We’ve partnered with tech companies across industries to build and scale apps using Heroku. From crafting tailored solutions to ensuring smooth migrations, our team takes the platform’s power and makes it your competitive advantage.

Ready to see what Heroku can really do? Check out Oktana’s Heroku application development expertise.

Empowering Women in Tech: Romina’s Journey at Oktana

At Oktana, we are deeply committed to fostering an inclusive environment where diversity thrives, particularly when it comes to women in tech. While the technology industry has made progress in promoting gender equality, we recognize that there is still significant work to be done. We believe in creating opportunities for women to grow and succeed in technical roles, and we actively work to increase the representation of women across our teams. 

This blog post marks the beginning of our “Empowering Women in Tech” interview series, where we’ll interview some of the incredible women in Oktana’s technical team. Through their stories, we hope to inspire more women to pursue careers in technology, showing them that there is space for them to innovate, lead, and thrive.

This first article focuses on Romina, a senior developer from Uruguay who has been with Oktana for nine years and has contributed immensely to our growth and success. Romina’s journey with Oktana is a testament to the value of persistence and expertise in the tech industry.

Get inspired by Romina’s journey and see how her passion has shaped her career at Oktana.

Romina at Yosemite park for Dreamforce 2017

Romina, what inspired you to pursue a career in software development?

Ever since I was a child, I have been particularly interested in maths and problem-solving activities – it was fun! I enjoyed using computers and felt the software industry had a lot of potential. My first programming activity was in primary school, using Logo, a graphical interface application with a cute little turtle that you can program to make drawings.

How has your experience working at Oktana been for the past nine years? What keeps you motivated?

It’s been a journey! I learned a lot and I continue to do so. I grew professionally, having the opportunity to work with many people from different backgrounds and countries, learning from a handful of different mentors with different styles, and then having the chance to mentor others. On each project, I faced various challenges that pushed me to acquire new skills and find different solutions. I also had the opportunity to enjoy team-building activities both in my country and abroad, IRL and online, and I made friends worldwide.

I am lucky to enjoy what I do, solving problems for users and companies we partner with to make their lives easier and improve their products is a great source of motivation, learning new things mentoring others, and watching them grow too.

What challenges have you faced as a woman in the tech industry, and how have you overcome them?

When I was in high school, I heard some people say that engineering was for men, but I didn’t listen. At my university, everyone was welcoming, and I wasn’t alone, women were around 15% of students. At work, just stay focused on your tasks and any team will quickly see your value.

What advice would you give to young women who are considering a career in tech?

Follow your passion. Harsh words fall on deaf ears.

How do you think the tech industry has changed for women since you started your career?

As more women are joining in recent years, it’s not so eccentric to have one on your team anymore. I think the more diverse a team is, the more they can see and achieve.

Can you describe a project at Oktana that you’re particularly proud of, and what role you played in it?

On the project I’ve been on the longest so far when I started I was probably the youngest on the team, also one of the least experienced, and I was the only woman on the development team at the time. I was lucky enough to have great mentors, see the team grow from just over 10 people to over 100 including more women in the technical area, be in charge of responsible tasks, become a technical reference, and mentor several of our new colleagues.

Where do you see yourself in the next few years, and how do you hope to contribute to the tech industry?

I hope to continue growing and help others grow.

As we continue to grow, we remain committed to creating an environment where women can thrive and contribute to the tech industry at the highest levels. We are excited to share more stories of the talented women who are helping drive success at Oktana in our “Empowering Women in Tech” series. We hope these interviews inspire others to see that there is a place for them in the tech world. 

Stay tuned for more insights and experiences from the women shaping our company’s future.

Step-by-Step Guide: Integrating Salesforce with AWS S3

In today’s data-driven world, efficient data management and seamless platform integration are paramount. This article will walk you through the step-by-step process of configuring Salesforce and AWS S3 to work in harmony. This will enable industry professionals to create, read, update, and delete objects with ease, ensuring smooth data operations and enhanced productivity.

AWS Configuration

Creating AWS S3 Policy

1. Log in to AWS Console.

2. Navigate to IAM (use the search bar).

3. Click on Policies (on the left side of the screen).

4. Click on Create policy.

5. Click Choose a service then select S3.

6. Provide the following permissions under:

  • Read Section: GetObject
  • Write Section: DeleteObject and PutObject
  • List Section: ListBucket and ListBucketMultipartUploads

7. Then in the Resources section click on Add ARN next to “bucket”.

  • Bucket Name: bucket-s3-<your initials>-<favorite animal>
  • Check Any checkbox for Object Name.

8. Enter PolicyS3SalesforceIntegrationReadOnly as a name for the new policy. 

9. Click Create Policy.

Creating AWS S3 User

1. Click on Users (on the left side of the screen).

2. Click on Create user.

3. Type User-S3-Salesforce-Integration in the Name field then click Next.

4. Click Attach policies directly.

5. Select the PolicyS3SalesforceIntegrationReadOnly policy to add.

6. Click Next and review the Summary Details.

7. Click Create User.

Generating AWS IAM User Access & Secret Key

1. Click on Users (on the left side of the screen).

2. Open the recently created user User-S3-Salesforce-Integration.

3. Click on the Security Credentials tab.

4. Click on Create access key (top right of the screen).

5. Select Other then click Next.

6. Provide Key-S3-Salesforce-Integration_<CurrentYear>_<CurrentMonth> as a description.

7. Click Create access key.

8. Click on Download .csv file.

9. Securely store the keys, they will be used at a later point in this guide.


Creating AWS S3 Bucket & Objects

1. Navigate to S3 (use the search bar).

2. Click on Create bucket.

3. Provide the following as bucket name: bucket-s3-<your name initials>-<favorite animal>

Note: Use the same bucket name provided while creating the IAM Policy.

4. Click on Create bucket.

5. Open the newly created bucket.

6. Upload a couple of files or images.

Salesforce Configuration

Storing AWS S3 Access & Secret Key in Salesforce

1. Log in to Salesforce (Trailhead Playground or Salesforce Developer Org).

2. Navigate to Setup > Named Credentials then click on External Credentials tab.

3. Click on New.

4. Provide the following information:

  • Label: AWS S3 Credential
  • Name: AWS_S3_Credential
  • Authentication Protocol: AWS Signature Version 4
  • Service: s3
  • Region: us-east-1 (or the one where you created the s3 bucket)
  • AWS Account ID: <your AWS account ID>

5. Click Save.

6. Click New on the Principals section.

7. Provide the following information:

  • Parameter Name: AWS S3 Principal
  • Sequence Number: 1
  • Access Key: generated in AWS IAM
  • Access Secret: generated in AWS IAM

8. Go back to the Named Credentials tab.

9. Click on New.

10. Provide the following information:

  • Label: AWS S3
  • Name: AWS_S3
  • URL: https://<your-bucket-name>.s3.<your-bucket-region>.amazonaws.com
  • Enabled for Callouts: Yes
  • External Credential: AWS S3 Credential
  • Generate Authorization Header: Checked

11. Click Save.

Providing access to Credentials in Salesforce

1. Navigate to Setup > Permission Sets.

2. Click on New.

3. Provide the following information:

  • Label: AWS S3 User
  • API Name: AWS_S3_User

4. Click Save.

5. Click on Object Settings.

6. Search for and open User External Credentials then click on Edit.

7. Provide Read access.

8. Go back to Permission Set Overview and click on External Credential Principal Access.

9. Add the AWS_S3_Credential – AWS S3 Principal.

10. Assign the Permission Set to the user that you would like to provide access.

Testing Integration

Listing Bucket Objects

This code retrieves all objects stored in the S3 bucket using an HTTP GET request to the S3 endpoint.

				
					HttpRequest request = new HttpRequest();
request.setMethod('GET');
request.setEndpoint('callout:AWS_S3' + '/');
Http http = new Http();
HttpResponse res = http.send(request);

//Checkpoint
Assert.areEqual(200,res.getStatusCode());

//The following section processes the XML result and formats the data for better readability.
String namespace = 'http://s3.amazonaws.com/doc/2006-03-01/';
Dom.Document doc = res.getBodyDocument();
Dom.XMLNode root = doc.getRootElement();

String bucketName = root.getChildElement('Name', namespace).getText();

System.debug('Bucket Name: ' + bucketName);
System.debug('The following objects are stored in the bucket: ');

for (Dom.XMLNode node : root.getChildElements()) {
	if (node.getName() == 'Contents' && node.getNamespace() == namespace) {
    	String key = node.getChildElement('Key', namespace).getText();
    	String lastModified = node.getChildElement('LastModified', namespace).getText();
    	String storageClass = node.getChildElement('StorageClass', namespace).getText();

    	System.debug('Key: ' + key);
    	System.debug('StorageClass: ' + storageClass);
    	System.debug('LastModified: ' + lastModified);   	 
    }
}


Adding Objects

This code uploads a text file to the S3 bucket using an HTTP PUT request, with the file content included in the request body.

Note: If you want to upload binary data, you can use setBodyAsBlob(…) instead of setBody(…).

				
					String fileNameToCreate = 'BytesInTheCloud.txt';
String fileContent = 'Greetings from the cloud! Your data is safe and sound in S3.';

HttpRequest request = new HttpRequest();
request.setMethod('PUT');
request.setBody(fileContent);
request.setEndpoint('callout:AWS_S3/' + fileNameToCreate);

Http http = new Http();
HttpResponse res = http.send(request);

//Checkpoint
Assert.areEqual(200,res.getStatusCode());


As you can see in the screenshot below, the BytesInTheCloud.txt file has been added.

Updating Objects

This code updates the content of an existing file in the S3 bucket using an HTTP PUT request with the new content in the request body.

				
					String fileNameToUpdate = 'BytesInTheCloud.txt';
String fileNewContent = 'Data update complete! Your bytes are now even more awesome.';

HttpRequest request = new HttpRequest();
request.setMethod('PUT');
request.setBody(fileNewContent);
request.setEndpoint('callout:AWS_S3/' + fileNameToUpdate);

Http http = new Http();
HttpResponse res = http.send(request);

//Checkpoint
Assert.areEqual(200,res.getStatusCode());


As you can see in the screenshot below, the BytesInTheCloud.txt file has been updated.

Deleting Object

This code deletes a specified file from the S3 bucket using an HTTP DELETE request. As you can see in the screenshot below, the Dog_3.jpg file has been deleted.

				
					String fileNameToDelete = 'Dog_3.jpg';

HttpRequest request = new HttpRequest();
request.setMethod('DELETE');
request.setEndpoint('callout:AWS_S3/' + fileNameToDelete);

Http http = new Http();
HttpResponse res = http.send(request);

//Checkpoint
Assert.areEqual(204,res.getStatusCode());


As you can see in the screenshot below, the Dog_3.jpg file has been deleted.

Conclusion

Integrating AWS S3 with Salesforce brings together two powerful platforms, enabling efficient and streamlined data management. By following the steps outlined in this article, you’ve successfully configured AWS and Salesforce, securely stored and accessed credentials, and tested the integration by performing various object operations. This seamless integration not only simplifies your data management tasks but also opens up new possibilities for automating and enhancing your workflows.

As you continue to explore and expand on this integration, you’ll find numerous ways to optimize your processes, improve data accessibility, and boost overall productivity. Remember, the key to successful integration lies in thorough testing and continuous learning. Embrace the power of Salesforce and AWS S3. Happy integrating!

FAQ

How do I find my bucket region?

  • Navigate to the S3 console.
  • Select your bucket.
  • The region is displayed in the bucket details.

How do I find my AWS account Id?

  • Go to the AWS Management Console.
  • Click on your account name (top right corner).
  • Copy the Account ID.

How do I assign a Permission Set to my user?

  • Log in to Salesforce.
  • Go to Setup > Permission Sets.
  • Select the desired Permission Set.
  • Click Manage Assignments.
  • Click Add Assignments and select the user(s) you want to assign the Permission Set to.
  • Click Assign.

Salesforce Summit Partner, 3 Years Running!

As a Salesforce consulting partner, we’re proud to have earned Summit tier for the third year in a row. 

Summit is the highest tier in the Salesforce Partner Program, previously branded as Platinum. Achieving Summit is no small feat and represents a high level of dedication and expertise across the Salesforce platform.

As an organization, we focus heavily on providing customers with Salesforce optimization and Salesforce staff augmentation, which is different from many other Summit partners that may strictly focus on initial implementations. Our work often includes implementing add-on products or complex integrations, but always includes optimizing the Salesforce products our customers have already invested in to run their business.

Less than 10% of all Salesforce consulting partners achieve Summit tier based on a genuine track record of delivering results and expertise. For us, earning Summit tier each year means a determined commitment across the organization on delivery and training.

In 2023 our team:

  • Earned 352 new Salesforce certifications
  • Completed 43 distinct Salesforce projects
  • Averaged 4.8/5 CSAT across those projects
 

Our Earned Partner Navigator Badges


Based in part on this,
 expertise is rated in the form of Partner Navigators. We’ve spoken to customers who believe these are paid badges, so it’s worth sharing that they are not – they are based on some of the above criteria and accurately represent our strengths.

For example, our Expert-level Partner Navigators speak to our experience in custom development on the platform and the fact that we’ve built 100+ community portals over the past decade. Managed Services, in the form of staff augmentation, has resulted in customer relationships averaging  4+ years.

Expert level

  1. Customer 360 Platform
  2. Experience Cloud 
  3. Managed Services

For the below Levels, while we didn’t heavily focus on certain aspects like PDO/AppExchange during the evaluation period, our expertise shines in other areas that qualify us for Expert-level distinction.

Level II Specialist

  1. Sales Cloud
  2. Service Cloud

Level I Specialist

  1. Einstein
  2. Industry Products
  3. MuleSoft
  4. Multi-Cloud Integration
  5. PDO/AppExchange

At the heart of our approach lies an unwavering commitment to our client’s success. We understand that every business is unique. From optimizing existing Salesforce systems to providing expert staff augmentation, our focus is on delivering tangible value that drives growth and efficiency. By partnering with us, businesses can trust in our dedication to their success and the transformative impact we bring to their operations.

Contact us today to learn how we can optimize your Salesforce ecosystem and propel your business forward.


Oktana Team
sales@oktana.com


Salesforce SAML SSO: A Step-by-Step Guide

This blog will cover an example use case for a SAML SSO solution, explore related concepts, and show how to implement it in the Salesforce platform.

The example use case is the following:

There are two orgs, Epic Innovations and Secure Ops, where the latter contains classified information that cannot leave the system for compliance reasons. Agents working on cases in the Epic Innovations org need some additional information available in the Secure Ops org to work on some of their cases.

Salesforce SAML SSO: A step-by-step guide


The requirements are:

  1. Password-Free Access

Agents should be able to log in to the Secure Ops org without re-entering their passwords.

  1. Conditional Access Control

Agents should be able to access the Secure Ops org only if they have open cases of type Classified assigned to them.

The subsequent sections are organized as follows: Section I reviews the relevant SAML SSO concepts, Section II, describes how the solution can be implemented in the Salesforce Platform, and Section III shows the implementation results.

1. SAML SSO Concepts

What is Single Sign-On?

Single sign-on (SSO) is an authentication method that enables users to access multiple applications with one login and one set of credentials [1].

SSO greatly simplifies the user experience by eliminating users needing to remember and enter different usernames and passwords for each application they use within a particular environment.

SSO is widely used in web applications and SaaS systems to streamline user authentication and improve overall security. It can be implemented using protocols such as OAuth, OpenID Connect, and SAML (Security Assertion Markup Language).

Identity Providers and Service Providers

An Identity Provider (IdP) is a trusted service that stores and verifies a user’s identity. SSO implementations use an IdP to verify the identity of the user attempting to log in. If their identity is verified, they’re given access to the system. Fig 1 shows an example of the X login page, where Google and Apple can be used as IdPs to verify a user’s identity.

Fig 1. x.com login page.

A Service Provider (SP) is an entity that provides resources or applications to an end user. In SSO, the SP relies on an IdP to verify a user’s identity. Going back to the X example, the X platform serves as an SP, providing access to the X web application, and relies on either Google or Apple to verify the user’s identity.

Salesforce is automatically enabled as an identity provider when a domain is created. After a domain is deployed, admins can add or change identity providers and increase security for their organization by customizing their domain’s login policy [2].

SAML SSO Flows

When setting up SAML SSO there are two possible ways of initiating the login process: from the identity provider or the service provider. The steps for each flow as outlined in the official Salesforce documentation [3] are described below.

Service Provider-Initiated SAML Flow

  1. The user requests a secure session to access a protected resource from the service provider. For instance, the user would like to access X, which can only be achieved by logging in.
  2. The service provider initiates login by sending a SAML request to the identity provider.
  3. The identity provider sends the user to a login page.
  4. The user enters their identity provider login credentials, and the identity provider authenticates the user.
  5. The identity provider now knows who the user is, so it sends a cryptographically signed SAML response to the service provider. The response contains a SAML assertion that tells the service provider who the user is.
  6. The service provider validates the signature in the SAML response and identifies the user.
  7. The user is now logged in to the service provider and can access the protected resource.

Identity Provider-Initiated SAML Flow

The IdP-Initiated flow is a shortened version of the SP-Initiated flow. In this case, a SAML request is unnecessary.

  1. The user logs in to the identity provider.
  2. The user clicks a button or link to access the service provider.
  3. The identity provider sends a cryptographically signed SAML response to the service provider. The response contains a SAML assertion that tells the service provider who the user is.
  4. The user is now logged in to the service provider and can access the protected resource.

II. Salesforce Implementation

Solution outline

In this blog post, the chosen solution for the sample use case involves implementing a service provider-initiated SAML SSO flow. A connected app for the Secure Ops organization will be configured within the Epic Innovations organization. This setup enables agents to be seamlessly redirected to the Secure Ops login page.

Upon reaching the Secure Ops login page, agents will be prompted to authenticate using their Epic Innovations credentials. Subsequently, the system initiates a verification process to check for any open cases of type Classified associated with the respective agent. If open cases are identified, the agents will be granted access. With open cases, they’re allowed access to the system.

Setting up Salesforce as a SAML Identity Provider

To let users access external systems and, in this case, the Secure Ops org, with their Epic Innovations credentials, the Epic Innovations org has to be enabled as an Identity provider.

To enable a Salesforce org as an IdP [4]:

  1. From Setup, in the Quick Find box, enter Identity Provider, then select Identity Provider.
  2. Click Enable Identity Provider.

Once enabled, you can click Edit to choose a certificate, Download Certificate to download the certificate, and Download Metadata to download the metadata associated with your identity provider, which contains information such as the Entity ID, Name ID Format, and other relevant information that will be discussed in the following sections.

Fig 2. Identity Provider Setup in the Epic Innovations org.

Setting up Salesforce as a SAML Service Provider

The Secure Ops org can be configured as a service provider to facilitate access to the Secure Ops organization using Epic Innovations credentials. This is achieved by creating a SAML single sign-on (SSO) setting using some information from the identity provider.

To create a SAML Single Sign-On Setting [5]:

  1. From Setup, in the Quick Find box, enter Single, and then select Single Sign-On Settings.
  2. Click New; this option allows you to specify all the settings manually. You can also create a configuration with existing Metadata Files.
  3. Fill in the relevant information as shown in the picture below.
Fig 3. Single Sign-On settings in the Secure Ops org.

Next, some of the key fields are described:

Name: Epic Innovations incorporation. This is a name that easily references the configuration. This name appears if the identity provider is added to My Domain or an Experience Cloud login page.

Issuer: A unique URL that identifies the identity provider. This was taken from the Identity Provider Setup configured in the Epic Innovations org.

Entity ID: A unique URL that specifies who the SAML assertion is intended for, i.e., the service provider. In this case, the Secure Ops domain is filled in.

Identity Provider Certificate: The authentication certificate issued by the identity provider. This was downloaded from the Identity Provider Setup configured in the Epic Innovations org.

Request Signing Certificate: The request signing certificate generates the signature on a SAML request to the identity provider for a service provider-initiated login.

Request Signature Method: Hashing algorithm for signed requests, either RSA-SHA1 or RSA-SHA256.

Assertion Decryption Certificate: If the identity provider encrypts SAML assertions, the appropriate certificate should be selected for this field. In this case, the Epic Innovations org would not encrypt the assertion, so the Assertion not encrypted option can be selected.

SAML Identity Type: This is selected based on how the identity provider identifies Salesforce users in SAML assertions. In this case, the Federation ID will be used.

SAML Identity Location: This option is based on where the identity provider stores the user’s identifier in SAML assertions. In this case, we chose Identity in the NameIdentifier element of the Subject statement. When we set up a connected app, we’ll specify this in the Epic Innovations org.

Service Provider Initiated Request Binding: This is selected according to the binding mechanism that the identity provider requests from SAML messages. In this case, HTTP POST will be used.

Identity Provider Login URL: Since HTTP POST was chosen as the request binding, the URL with endpoint /idp/endpoint/HttpPost is used. This endpoint can be found in the Identity Provider’s metadata file. Also, the corresponding endpoint for HTTP Redirect is available in this file.

Custom Logout URL: This is a URL to which the user will be redirected once logged out. Here, the Epic Innovations’ My Domain was chosen.

Adding the Epic Innovations org to the Secure Ops login page

With the SSO Setting in place, it is time to add the Epic Innovations login option to the Secure Ops login page.

To add the Epic Innovations login option to the My Domain login page [5]:

  1. From Setup, in the Quick Find box, enter My Domain, and then select My Domain.
  2. Under Authentication Configuration, click Edit.
  3. Enable the Epic Innovations option.
  4. Save the changes.
Fig 4. My Domain Authentication Configuration in the Secure Ops org.

Specifying a Service Provider as a Connected App

A connected app that implements SAML 2.0 for user authentication can be set up to integrate a service provider with Epic Innovations org.

To set up the connected app [6, 7]:

  1. From Setup, in the Quick Find box, enter Apps, and then select App Manager.
  2. Click New Connected App
  3. Fill in the basic information section as appropriate.
  4. In the Web App Settings section, fill in the Start URL with the Secure Ops’ My Domain. This will redirect users to Secure Ops org when they access the connected app.
  5. Click Enable SAML; this will allow more information to be filled in.
  6. For Entity ID, fill in the Secure Ops’ My Domain.
  7. For the ACS URL, which stands for Assertion Consumer Service URL, fill in Secure Ops’ My Domain. The SP’s metadata file can provide this.
  8. For Subject Type, select Federation ID. Remember that the service provider set the Identity Type to Federation ID.
  9. For Name ID Format, select the one that matches the NameIDFormat in the SP’s metadata file.

Add the Connected App to the App Launcher

Since the created Connected App has the start URL set up, it can be added to the app launcher for easier access. To do this:

  1. From Setup, in the Quick Find box, enter App Menu, and then select App Menu.
  2. Then, search the Connected App and mark it as Visible in App Launcher.

Setting up conditional access control

As stated in the requirements, users should only be able to access the Secure Ops org whenever they have open cases marked as classified. A Connected App handler will be used to fulfill this requirement. Connected App handlers can be used to customize connected apps’ behavior when invoked.

A Connected App handler is an Apex class that extends the ConnectedAppPlugin class. Here is the entire implementation for this use case.

				
					global with sharing class SecureOpsAppPlugin extends Auth.ConnectedAppPlugin
{
        global override Boolean authorize(
Id userId,
Id connectedAppId,
Boolean isAdminApproved,
Auth.InvocationContext context
    ){
        // get the number of open cases the user has
        Integer i = [
SELECT COUNT() FROM Case
WHERE
Status!='Closed' AND Type='Classified' AND OwnerId=:userId
   ];
        
        // if the user has one or more cases open, authorize access
        return (i > 0);
    }
}


As mentioned earlier, the created class extends the ConnectedAppPlugin class. In this case, the authorized method is overridden. This method permits the specified user to access the connected app [8]. The method returns a boolean indicating whether the user is approved or not to access the connected app. A value true indicates the user is authorized, and a false indicates that it didn’t grant access.

Since the requirements indicate that access should be denied if there are no open cases, the code runs a COUNT query to check the number of Open cases of type Classified the user has. If the user has at least one case with those characteristics, the method returns true, granting access to the connected app. Otherwise, it returns false, denying access.

Managing Users

There’s one last task before diving into the results: user management. While configuring the Single Sign-On settings, it was established that the Federation ID would be the identifier for the user logging in.

Consequently, any user logging into the Secure Ops organization via the Epic Innovations login should have a corresponding user in the Epic Innovations organization with a matching Federation ID. If a matching Federation ID is not found, the user cannot log in.

To set the Federation ID for a user:

  1. From Setup, in the Quick Find box, enter Users, and then select Users.
  2. Find the user and click Edit.
  3. In the Single Sign On Information section, fill in the Federation ID field.


III. Results

To validate the implementation, let’s first try to access the Secure Ops org without any cases of type Classified open.

From the App Launcher, we select the Secure Ops Solutions connected app we created.

Fig 5. Secure Ops Connected App in the App Launcher.

This redirects us to the Secure Ops organization where we have the option to log in with Secure Ops credentials or via Epic Innovations, we choose Epic Innovations.

Fig 6. Login options for the Secure Ops organization.

We get an insufficient privileges error because the Epic Innovations organization doesn’t have any open cases of type Classified. So, our application handler denies access to the Secure Ops organization.

Fig 7. Insufficient privileges error when trying to access the Secure Ops organization.

Now, let’s create a case and set the type to be Classified. Since we don’t have any other automation, the case is automatically assigned to our user. We can now try to access the Secure Ops org.

Fig 8. New case of type Classified in the Epic Innovations org.

If we attempt the same process, we can log in to the Secure Ops org.


Contact us to explore our services and discover how our extensive knowledge at Oktana can assist you in launching a successful project.

How to Make Your Salesforce Org Secure

In our previous blog post, “One way to keep your org secure: Salesforce Health Check” we covered the built-in Salesforce Health Check tool, the benefits of running a health check, and why you and your company need one.

This blog will cover some in-depth steps you can follow as a guide if you are a Salesforce developer or Admin to make your org more secure. That being said, let’s get to it!

Salesforce org secure health check

The Lightning Platform has been migrating from Aura components to Lightning Web Components (LWC) for some years. Even though both are still supported and can coexist on the same page and even share information, Salesforce is focusing on LWC, and we should do the same. 

When you run your Health Check application, you have 3 moving parts involved:

  1. The Salesforce org
  2. The client (LWC)
  3. The backend code (Apex)


We have configurations available in Setup > Security, allowing us to configure how the app runs. I recommend turning on the following options: 

  • Require HttpOnly Attribute

Setting the HttpOnly attribute will change how an app communicates with the Salesforce server by increasing the security of each cookie the app sends. Since HttpOnly prevents cookies from being read by JavaScript, the browser can receive the cookie, but it cannot be modified in the browser. 

HttpOnly is an additional flag included in the Set-Cookie HTTP response header. Using the HttpOnly flag when generating a cookie helps mitigate the risk of a client-side script accessing the protected cookie.

  • Enable User Certificates 

This setting allows certificate-based authentication to use PEM-encoded X.509 digital certificates to authenticate individual users to your org.

  • Enable Clickjack Protection

You can set the clickjack protection for a site to one of these levels.

  • Allow framing by any page (no protection).
  • Allow framing by the same origin only (recommended).
  • Don’t allow framing by any page (most protection).

Salesforce Communities have two clickjack protection parts. We recommend that you set both to the same level.

  • Force.com Communities site (set from the Force.com site detail page)
  • Site.com Communities site (set from the Site.com configuration page)
  • Require HTTPS

This setting must be enabled in two locations. 

Enable HSTS for Sites and Communities in Session Settings.

Enable Require Secure Connections (HTTPS) in the community or Salesforce site security settings.

  • Session Timeout

It’s a good idea to set a short timeout period if your org has sensitive information and you want to enforce strong security.

You can set values, including: 

  • Timeout value
  • Force logout on session timeout
  • Disable the timeout warning popup
  • Enable Cross-Site Scripting (XSS) Protection

Enable the XSS protection setting to protect against reflected cross-site scripting attacks. If a reflected cross-site scripting attack is detected, the browser shows a blank page with no content. Without content, scripts cannot be used to inject attacks. 

  • Use the Latest Version of Locker

Lightning Locker provides component isolation and security, allowing code from many sources to execute and interact using safe, standard APIs and event mechanisms. Lightning Locker is enabled for all custom LWCs and automatically updates. If you’re using Aura, check your version for compatibility.

One more thing...

I want to spend more time discussing a feature that helps us run our application even more securely. And I am talking about Salesforce Shield. Salesforce Shield allows you to run your application more securely with some features like encryption and monitoring. It adds an extra layer of confidence, privacy, and security and lets us build a new level of trust, compliance, transparency, and governance.

Salesforce Shields is composed of 3 easy to use point and clicks tools, which are:

  1. Platform Encryption: It is designed to bring us state-of-the-art encryption while we do not lose access to key features such as search, validation rules, etc. It can derive the encryption keys from org-specific data or even import our encryption keys(adding an extra layer of control)
  2. Monitoring Events: We often need to track specific events in our orgs (who accesses a piece of data, how the encryption keys are, who is logging, and from where). Monitoring events is the tool for it allowing us to track and access all these events and more from the API and integrate it with the monitoring tool of our choice(New Relic, Splunk, others)
  3. Audit Trail: Some industries require us to keep track of changes in data. Turning on tracking specific fields and setting up an audit policy, we can store historical values for up to 10 years.

Conclusion

It is essential to consider security while developing apps and maintaining our Salesforce org secure. And even though it might seem complicated (and it is), incorporating the Health Check tool and salesforce shield in our development process will help us to keep our org in a good, healthy state.


You can also watch our on-demand Health Check Assessment webinar by my colleagues Zach and Heather, where they covered 4 simple steps to ensure the health of your Salesforce org. 

Organize Your Gmail Inbox with Google Apps Script

Managing a cluttered inbox can be overwhelming and time-consuming. Fortunately, Google Apps Script provides a powerful toolset that allows you to automate tasks within Gmail, making it easier to keep your inbox organized and streamlined. In this article, we will explore how to use Google Apps Script to organize your Gmail inbox efficiently.

Visit the Google Apps Script website, and create a new project by clicking on “New Project” from the main menu. This will open the Apps Script editor, where you can write and manage your scripts.

Label and Categorize Emails

The first step in organizing your inbox is to create labels and categorize your emails based on specific criteria. For example, you can create labels for “Project B,” “Project A,” “Important,” or any other custom categories you need. Use the following code to add labels to your emails:

				
					function categorizeEmails(){
let count = 100
const priorityAddresses = [
'important@example.com'
].map((address) => `from:${address}`).join(' OR ');

const labelName = "Important"; // Replace with your desired label name
const label = GmailApp.createLabel(labelName);

while (count > 0) {
const threads = GmailApp.search(`${priorityAddresses} -has:userlabels`, 0, 10)
count = threads.length
for(const thread of threads) {
thread.markImportant();
label.addToThread(thread);
}
}
}


Archive or Delete Old Emails

Having old and unnecessary emails in your inbox can lead to clutter. With Google Apps Script, you can automatically archive or delete emails that are older than a certain date. Here’s how:

				
					function archiveOldEmails() {
  const threads = GmailApp.search("in:inbox before:30d");
  for (const thread of threads) {
	thread.moveToArchive();
  }
}


					function deleteUnwantedMessages() {
let count = 100
const blockedAddresses = [
'spam1@example.com',
'spam2@example.com'
].map((address) => `from:${address}`).join(' OR ');
const searchQuery = `category:promotions OR category:social OR ${blockedAddresses}`;
while (count > 0) {
const threads = GmailApp.search(searchQuery, 0, 10);
count = threads.length
console.log(`Found ${count} unwanted threads`);
for(const thread of threads) {
console.log(`Moved to trash thread with id: ${thread.getId()}`)
thread.moveToTrash();
}
}
console.log("Deleting messages complete.");
}


Reply to Important Emails

It’s essential to respond promptly to crucial emails. With Google Apps Script, you can set up a script that automatically sends a reply to specific emails based on their sender or subject. Here’s a simple example:

				
					function autoReplyImportantEmails() {
  const importantSender = "important@example.com"; // Replace with the email address of the important sender
  const importantSubject = "Important Subject"; // Replace with the subject of important emails

  const threads = GmailApp.search(`is:unread from: ${importantSender} subject:${importantSubject}`);
  const replyMessage = "Thank you for your email. I will get back to you shortly.";

  for (const thread of threads) {
	threads[i].reply(replyMessage);
  }
}


Schedule Your Scripts

Once you have written your scripts, schedule them to run automatically at specific intervals. To do this, go to the Apps Script editor, click on the clock icon, and set up a time-driven trigger. You can choose to run the script daily, weekly, or at any custom frequency that suits your needs.

Conclusion

Organizing your Gmail inbox with Google Apps Script can significantly improve your productivity and reduce the time spent on email management. With the ability to label and categorize emails, archive or delete old messages, and automatically respond to important emails, you can maintain a clutter-free and efficiently organized inbox. Explore the power of Google Apps Script, and tailor your scripts to suit your unique email management requirements.


Read more about the latest tech trends in our blog.

Harnessing the Power of ChatGPT and Salesforce

Boosting Sales and Customer Experience

In today’s highly competitive business landscape, companies constantly seek innovative ways to enhance their sales processes and provide exceptional customer experiences. Two powerful tools that have gained immense popularity in recent years are ChatGPT and Salesforce. ChatGPT, an AI-based language model, and Salesforce, a robust customer relationship management (CRM) platform, can work synergistically to revolutionize sales and take customer interactions to the next level. In this blog post, we will explore the benefits of integrating ChatGPT with Salesforce and delve into the various use cases that can maximize your sales efforts.

Personalized Customer Interactions:

One of the key advantages of combining ChatGPT and Salesforce is the ability to deliver highly personalized customer interactions. By integrating ChatGPT with Salesforce’s customer data, you can access detailed information about each customer, including their purchase history, preferences, and behavior patterns. This valuable data empowers your chatbots to provide tailored recommendations, answer queries, and offer relevant products or services. The result is a seamless, personalized customer experience that fosters trust and enhances satisfaction.

24/7 Availability:

Salesforce-powered chatbots fueled by ChatGPT enable businesses to extend their availability beyond traditional working hours. With automated chat capabilities, customers can engage with your brand anytime, anywhere. Whether it’s seeking product information, resolving issues, or placing orders, your chatbot can provide real-time assistance, reducing response times and ensuring round-the-clock support. This continuous availability strengthens customer loyalty and enhances the overall sales process.

Lead Generation and Qualification:

Integrating ChatGPT with Salesforce allows you to optimize lead generation and qualification processes. Chatbots can engage potential customers in conversations, gathering valuable data and qualifying leads based on predefined criteria. By seamlessly transferring qualified leads to Salesforce, your sales team can focus their efforts on high-priority prospects, increasing efficiency and conversion rates. The integration also enables lead nurturing and follow-up, ensuring a consistent and streamlined sales pipeline.

Real-time Sales Support:

ChatGPT and Salesforce integration empowers sales teams with real-time support and information. Sales representatives can leverage the chatbot’s capabilities to access product details, pricing information, and even real-time inventory updates. This immediate access to critical data allows sales professionals to provide accurate and up-to-date information to customers, making their interactions more impactful. The integration streamlines the sales process, reduces errors, and enhances productivity.

Embracing these technologies enables companies to stay ahead of the competition, nurture customer relationships, and drive revenue growth. Explore the possibilities of ChatGPT and Salesforce integration, and unlock the full potential of your sales process.

Image suggestion: An image showcasing a seamless connection between ChatGPT and Salesforce, symbolizing the integration’s potential and impact on sales.

The seamless integration of ChatGPT and Salesforce presents a significant opportunity for businesses to enhance their sales processes and deliver exceptional customer experiences. By ensuring that the chatbot conversations feel natural and undetectable, leveraging customer data for personalization, establishing a dynamic connection with Salesforce, and automating lead qualification, companies can achieve impressive results. Embrace the power of this integration to stay ahead of the competition, nurture customer relationships, and drive sales growth, all while maintaining an undetectable and authentic conversational experience.

The use of appropriate techniques and responsible AI practices is essential to maintain ethical standards and ensure that customers are aware when interacting with a chatbot rather than a human representative. Transparency about the nature of the interaction is crucial for building trust and maintaining ethical guidelines.

Can we create a fully functional conversational bot that leverages the power of a Large Language Model (LLM)? YES! Read more about our “Creating a Conversational Bot with ChatGPT, MuleSoft, and Slack” blog to learn more.

Creating a Conversational Bot with ChatGPT, MuleSoft, and Slack

Can we create a fully functional conversational bot that leverages the power of a Large Language Model (LLM)? The answer is a resounding yes!

In this post, we’ll guide you through the process of building a robust and interactive conversational bot from scratch. If you have a fresh OpenAI account, it’s possible to utilize 100% free accounts and software since OpenAI gives us $15 of credit to try it. If not, you must add credits to your OpenAI account, but it’s inexpensive for this sample app.

We’ll use MuleSoft, Slack, and the state-of-the-art ChatGPT to make it happen. Unlike traditional NLP systems, ChatGPT is an LLM designed to understand and generate human-like text. This makes it extremely useful for various language-processing tasks.

So, buckle up and join us as we reveal the secrets to creating an intelligent bot that leverages the advanced capabilities of ChatGPT, an LLM that can enhance team collaboration and productivity, and deliver a seamless user experience. Let’s dive in!

Note: The accounts and software used in this post could have some limitations since MuleSoft gives us trial accounts.

The main purpose it’s that you understand and learn the basics about:

  • Implementation of OpenAI REST API (we’ll be using ChatGPT-3.5-turbo model)
  • How to create a simple backend integration with Anypoint Studio.
  • How to realize an integration with Slack.

Pre-requirements

  • Anypoint Studio’s latest version.
    • Once you installed Anypoint Studio and created a new Mule Project, we need to install the Slack Connector, you just need to access the Anypoint Exchange tab, and then you will be able to search for and install the connector.
  • Anypoint Platform trial account, you can create a 30 days trial account.
  • A Slack Bot installed on a Channel.
  • An OpenAI account with available credit. Remember, OpenAI gives us $15 if it’s your first account. If you previously registered on the OpenAI platform, then you will need to add a balance to your account. However, following this guide and creating your sample application, will be really cheap.

Once we have everything installed and configured, we can proceed with getting the corresponding authorization tokens that we will need along with our integration. Save these in your mule-properties .yaml file.

OpenAI API Key

Once you have created your account on OpenAI, you will be able to access your account dashboard, where you will see a tab labeled “API Keys”. Here, you can generate your secret key to make requests to the OpenAI API. Simply click on “Create new secret key”, copy the key, and save it to a text file.

Slack Oauth

On your Slack application, you should have already configured your bot inside a channel on Slack. If you don’t know how to do it, you can follow this guide. On Bot’s scope configuration, enable ‘channels:read’, ‘chat:write:bot’, and ‘channels:history’. 

This screenshot it’s an example of how looks the interface, you will have your own client ID and Client Secret:

Configuration properties of a Conversational Bot

You can use this sample file for your mule-properties .yaml file, you just need to replace your own KEYS and IDs.

The Integration

Now that we have our Bot created in Slack, and our API Key on the OpenAI dashboard, you start getting an idea about the roles of each system and which is the missing piece that connects them all, that’s right, it’s MuleSoft’s Anypoint Platform.

The Project Structure

The project is divided into a main flow, and 3 flows, divided according to functionality. We need to do some things between receiving and replying to a message from a user on Slack. Please see the image below, and each block’s explanation.

Main Flow

  1. This Mule flow listens for new messages in a Slack channel using the slack:on-new-message-trigger component. The channel is specified using the ${slack.conversationId} property. A scheduling strategy is set to run the flow every 5 seconds using the fixed-frequency component.
  2. Next, the flow checks if the message received is from a user and not from the bot itself. If the message is from the bot, the flow logs a message saying that it is the bot.
  3. The incoming message is then transformed using the DataWeave expression in the Transform Message component. The transformed message is stored in the incomingMessage variable, which contains the user, timestamp, and message text. 
    • If the message is from a user, the incomingMessage.message is checked to see if it equals “new”. If it does, the finish-existing-session-flow is invoked using the flow-ref component. If it doesn’t equal “new”, the check-session-flow is invoked with the target set to incomingMessage.

Overall, this flow handles incoming messages in a Slack channel and uses choice components to determine how to process the message based on its content and source.

The finish-existing-session-flow and check-session-flow are likely other flows in the application that handle the logic for finishing existing sessions or checking if a new session needs to be started.

Finish existing session flow

  • “Finish-existing-session-flow”: terminates the previous session created by the user.

Check session flow

This flow called “check-session-flow” checks if a user has an existing session or not, and if not, it creates one for the user. The flow follows the following steps:

  1. Check if a user has an existing session: This step checks if the user has an existing session by looking up the user’s ID in an object store called “tokenStore”.
  2. Check array messages user: This step checks the object store “store_messages_user” to see if there are any messages stored for the user.
  3. Choice Payload: This step uses a choice component to check if the payload returned from step 1 is true or not.
    • When Payload is true: If the payload from step 1 is true, this step retrieves the existing session ID from the “tokenStore” object store and sets it as a variable called “sessionId”. It also retrieves any messages stored for the user from the “store_messages_user” object store and sets them as a variable called “messageId”. Finally, it logs the “messageId” variable.
    • Otherwise: If the payload from step 1 is not true, this step sets a welcome message to the user and stores it in the “store_messages_user” object store. It generates a new session ID and stores it in the “tokenStore” object store. Finally, it sets the “sessionId” variable and generates a welcome message for the user in Slack format.
  4. At the end of the flow is where we interact with OpenAI API, calling a flow named “make-openai-request-flow”.

The steps in this flow ensure that a user’s session is properly handled and that messages are stored and retrieved correctly.

Make OpenAI request flow

The purpose of this flow is to take a user’s message from Slack, send it to OpenAI’s API for processing, and then return the response to the user via Slack. The flow can be broken down into the following steps:

  1. Transform the user’s message into a format that can be sent to OpenAI’s API. This transformation is done using DataWeave language in the “Transform Message” component. The transformed payload includes the user’s message, as well as additional data such as the OpenAI API model to use, and a default message to send if there is an error.
  2. Log the transformed payload using the “Logger” component. (Optional, was used to check if the payload was loaded correctly)
  3. Send an HTTP request to OpenAI’s API using the “Request to ChatGPT” component. This component includes the OpenAI API key as an HTTP header.
  4. Store the user’s message and OpenAI’s response in an object store using the “Store message user” component. This allows the application to retrieve the conversation history later. (please read more about this on OpenAI documentation. This will help to keep the conversation context that a user has with ChatGPT since messages are stored with roles: “user” and “assistant”.).
  5. Transform the OpenAI response into a format that can be sent to Slack using the “Make JSON to send through Slack” component. This component creates a JSON payload that includes the user’s original message, the OpenAI response, and formatting information for Slack.
  6. Send the Slack payload as an ephemeral message to the user using the “send answer from chatGPT to Slack” component.
  7. As the final step, we delete the original message sent by the user, as we are using ‘Ephemeral messages’, since the Bot is deployed on a channel, the messages are public, with ‘Ephemeral messages’ we can improve the privacy on the messages sent on the Slack channel.
    1. Create a payload to delete the original message from Slack using the “payload to delete sent messages” component.
    2. Send a request to delete the original message from Slack using the “delete sent message” component. 

By following these steps, the MuleSoft application can take a user’s message from Slack, send it to OpenAI’s API, and return the response to the user via Slack, while also storing the conversation history for later use.

This was created and tested with these versions:
Mule Runtime v4.4.0
Anypoint Studio v7.14
Slack Connector v1.0.16