This blog will cover an example use case for a SAML SSO solution, explore related concepts, and show how to implement it in the Salesforce platform.
The example use case is the following:
There are two orgs, Epic Innovations and Secure Ops, where the latter contains classified information that cannot leave the system for compliance reasons. Agents working on cases in the Epic Innovations org need some additional information available in the Secure Ops org to work on some of their cases.

The requirements are:
- Password-Free Access
Agents should be able to log in to the Secure Ops org without re-entering their passwords.
- Conditional Access Control
Agents should be able to access the Secure Ops org only if they have open cases of type Classified assigned to them.
The subsequent sections are organized as follows: Section I reviews the relevant SAML SSO concepts, Section II, describes how the solution can be implemented in the Salesforce Platform, and Section III shows the implementation results.
1. SAML SSO Concepts
What is Single Sign-On?
Single sign-on (SSO) is an authentication method that enables users to access multiple applications with one login and one set of credentials [1].
SSO greatly simplifies the user experience by eliminating users needing to remember and enter different usernames and passwords for each application they use within a particular environment.
SSO is widely used in web applications and SaaS systems to streamline user authentication and improve overall security. It can be implemented using protocols such as OAuth, OpenID Connect, and SAML (Security Assertion Markup Language).
Identity Providers and Service Providers
An Identity Provider (IdP) is a trusted service that stores and verifies a user’s identity. SSO implementations use an IdP to verify the identity of the user attempting to log in. If their identity is verified, they’re given access to the system. Fig 1 shows an example of the X login page, where Google and Apple can be used as IdPs to verify a user’s identity.
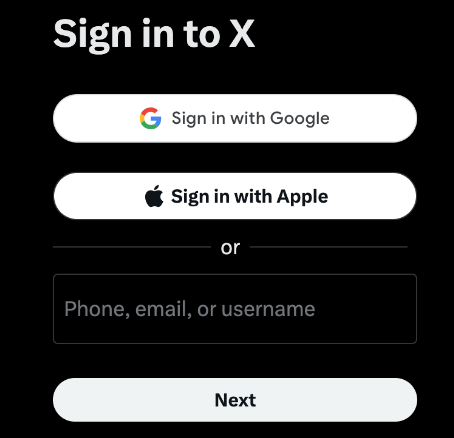
A Service Provider (SP) is an entity that provides resources or applications to an end user. In SSO, the SP relies on an IdP to verify a user’s identity. Going back to the X example, the X platform serves as an SP, providing access to the X web application, and relies on either Google or Apple to verify the user’s identity.
Salesforce is automatically enabled as an identity provider when a domain is created. After a domain is deployed, admins can add or change identity providers and increase security for their organization by customizing their domain’s login policy [2].
SAML SSO Flows
When setting up SAML SSO there are two possible ways of initiating the login process: from the identity provider or the service provider. The steps for each flow as outlined in the official Salesforce documentation [3] are described below.
Service Provider-Initiated SAML Flow
- The user requests a secure session to access a protected resource from the service provider. For instance, the user would like to access X, which can only be achieved by logging in.
- The service provider initiates login by sending a SAML request to the identity provider.
- The identity provider sends the user to a login page.
- The user enters their identity provider login credentials, and the identity provider authenticates the user.
- The identity provider now knows who the user is, so it sends a cryptographically signed SAML response to the service provider. The response contains a SAML assertion that tells the service provider who the user is.
- The service provider validates the signature in the SAML response and identifies the user.
- The user is now logged in to the service provider and can access the protected resource.
Identity Provider-Initiated SAML Flow
The IdP-Initiated flow is a shortened version of the SP-Initiated flow. In this case, a SAML request is unnecessary.
- The user logs in to the identity provider.
- The user clicks a button or link to access the service provider.
- The identity provider sends a cryptographically signed SAML response to the service provider. The response contains a SAML assertion that tells the service provider who the user is.
- The user is now logged in to the service provider and can access the protected resource.
II. Salesforce Implementation
Solution outline
In this blog post, the chosen solution for the sample use case involves implementing a service provider-initiated SAML SSO flow. A connected app for the Secure Ops organization will be configured within the Epic Innovations organization. This setup enables agents to be seamlessly redirected to the Secure Ops login page.
Upon reaching the Secure Ops login page, agents will be prompted to authenticate using their Epic Innovations credentials. Subsequently, the system initiates a verification process to check for any open cases of type Classified associated with the respective agent. If open cases are identified, the agents will be granted access. With open cases, they’re allowed access to the system.
Setting up Salesforce as a SAML Identity Provider
To let users access external systems and, in this case, the Secure Ops org, with their Epic Innovations credentials, the Epic Innovations org has to be enabled as an Identity provider.
To enable a Salesforce org as an IdP [4]:
- From Setup, in the Quick Find box, enter Identity Provider, then select Identity Provider.
- Click Enable Identity Provider.
Once enabled, you can click Edit to choose a certificate, Download Certificate to download the certificate, and Download Metadata to download the metadata associated with your identity provider, which contains information such as the Entity ID, Name ID Format, and other relevant information that will be discussed in the following sections.

Setting up Salesforce as a SAML Service Provider
The Secure Ops org can be configured as a service provider to facilitate access to the Secure Ops organization using Epic Innovations credentials. This is achieved by creating a SAML single sign-on (SSO) setting using some information from the identity provider.
To create a SAML Single Sign-On Setting [5]:
- From Setup, in the Quick Find box, enter Single, and then select Single Sign-On Settings.
- Click New; this option allows you to specify all the settings manually. You can also create a configuration with existing Metadata Files.
- Fill in the relevant information as shown in the picture below.
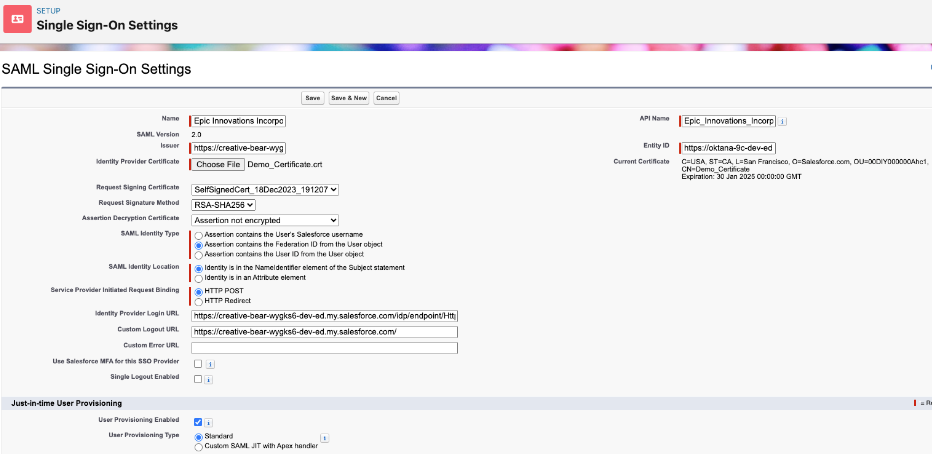
Next, some of the key fields are described:
Name: Epic Innovations incorporation. This is a name that easily references the configuration. This name appears if the identity provider is added to My Domain or an Experience Cloud login page.
Issuer: A unique URL that identifies the identity provider. This was taken from the Identity Provider Setup configured in the Epic Innovations org.
Entity ID: A unique URL that specifies who the SAML assertion is intended for, i.e., the service provider. In this case, the Secure Ops domain is filled in.
Identity Provider Certificate: The authentication certificate issued by the identity provider. This was downloaded from the Identity Provider Setup configured in the Epic Innovations org.
Request Signing Certificate: The request signing certificate generates the signature on a SAML request to the identity provider for a service provider-initiated login.
Request Signature Method: Hashing algorithm for signed requests, either RSA-SHA1 or RSA-SHA256.
Assertion Decryption Certificate: If the identity provider encrypts SAML assertions, the appropriate certificate should be selected for this field. In this case, the Epic Innovations org would not encrypt the assertion, so the Assertion not encrypted option can be selected.
SAML Identity Type: This is selected based on how the identity provider identifies Salesforce users in SAML assertions. In this case, the Federation ID will be used.
SAML Identity Location: This option is based on where the identity provider stores the user’s identifier in SAML assertions. In this case, we chose Identity in the NameIdentifier element of the Subject statement. When we set up a connected app, we’ll specify this in the Epic Innovations org.
Service Provider Initiated Request Binding: This is selected according to the binding mechanism that the identity provider requests from SAML messages. In this case, HTTP POST will be used.
Identity Provider Login URL: Since HTTP POST was chosen as the request binding, the URL with endpoint /idp/endpoint/HttpPost is used. This endpoint can be found in the Identity Provider’s metadata file. Also, the corresponding endpoint for HTTP Redirect is available in this file.
Custom Logout URL: This is a URL to which the user will be redirected once logged out. Here, the Epic Innovations’ My Domain was chosen.
Adding the Epic Innovations org to the Secure Ops login page
With the SSO Setting in place, it is time to add the Epic Innovations login option to the Secure Ops login page.
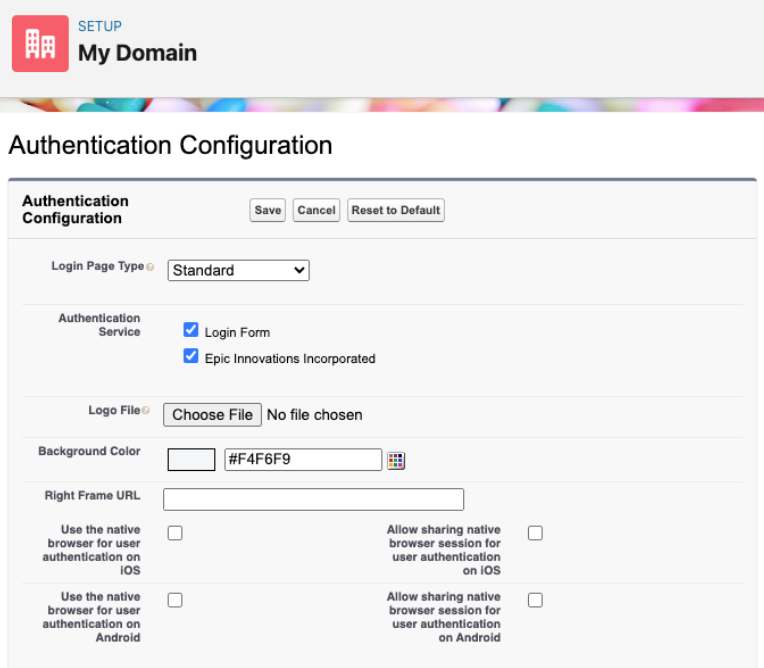
To add the Epic Innovations login option to the My Domain login page [5]:
- From Setup, in the Quick Find box, enter My Domain, and then select My Domain.
- Under Authentication Configuration, click Edit.
- Enable the Epic Innovations option.
- Save the changes.
Specifying a Service Provider as a Connected App
A connected app that implements SAML 2.0 for user authentication can be set up to integrate a service provider with Epic Innovations org.
To set up the connected app [6, 7]:
- From Setup, in the Quick Find box, enter Apps, and then select App Manager.
- Click New Connected App
- Fill in the basic information section as appropriate.
- In the Web App Settings section, fill in the Start URL with the Secure Ops’ My Domain. This will redirect users to Secure Ops org when they access the connected app.
- Click Enable SAML; this will allow more information to be filled in.
- For Entity ID, fill in the Secure Ops’ My Domain.
- For the ACS URL, which stands for Assertion Consumer Service URL, fill in Secure Ops’ My Domain. The SP’s metadata file can provide this.
- For Subject Type, select Federation ID. Remember that the service provider set the Identity Type to Federation ID.
- For Name ID Format, select the one that matches the NameIDFormat in the SP’s metadata file.
Add the Connected App to the App Launcher
Since the created Connected App has the start URL set up, it can be added to the app launcher for easier access. To do this:
- From Setup, in the Quick Find box, enter App Menu, and then select App Menu.
- Then, search the Connected App and mark it as Visible in App Launcher.
Setting up conditional access control
As stated in the requirements, users should only be able to access the Secure Ops org whenever they have open cases marked as classified. A Connected App handler will be used to fulfill this requirement. Connected App handlers can be used to customize connected apps’ behavior when invoked.
A Connected App handler is an Apex class that extends the ConnectedAppPlugin class. Here is the entire implementation for this use case.
					global with sharing class SecureOpsAppPlugin extends Auth.ConnectedAppPlugin
{
        global override Boolean authorize(
Id userId,
Id connectedAppId,
Boolean isAdminApproved,
Auth.InvocationContext context
    ){
        // get the number of open cases the user has
        Integer i = [
SELECT COUNT() FROM Case
WHERE
Status!='Closed' AND Type='Classified' AND OwnerId=:userId
   ];

        // if the user has one or more cases open, authorize access
        return (i > 0);
    }
}
As mentioned earlier, the created class extends the ConnectedAppPlugin class. In this case, the authorized method is overridden. This method permits the specified user to access the connected app [8]. The method returns a boolean indicating whether the user is approved or not to access the connected app. A value true indicates the user is authorized, and a false indicates that it didn’t grant access.
Since the requirements indicate that access should be denied if there are no open cases, the code runs a COUNT query to check the number of Open cases of type Classified the user has. If the user has at least one case with those characteristics, the method returns true, granting access to the connected app. Otherwise, it returns false, denying access.
Managing Users
There’s one last task before diving into the results: user management. While configuring the Single Sign-On settings, it was established that the Federation ID would be the identifier for the user logging in.
Consequently, any user logging into the Secure Ops organization via the Epic Innovations login should have a corresponding user in the Epic Innovations organization with a matching Federation ID. If a matching Federation ID is not found, the user cannot log in.
To set the Federation ID for a user:
- From Setup, in the Quick Find box, enter Users, and then select Users.
- Find the user and click Edit.
- In the Single Sign On Information section, fill in the Federation ID field.
III. Results
To validate the implementation, let’s first try to access the Secure Ops org without any cases of type Classified open.
From the App Launcher, we select the Secure Ops Solutions connected app we created.
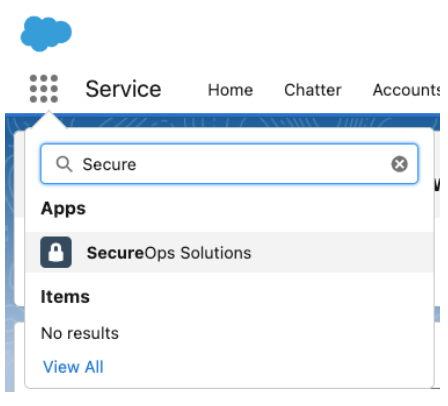
This redirects us to the Secure Ops organization where we have the option to log in with Secure Ops credentials or via Epic Innovations, we choose Epic Innovations.
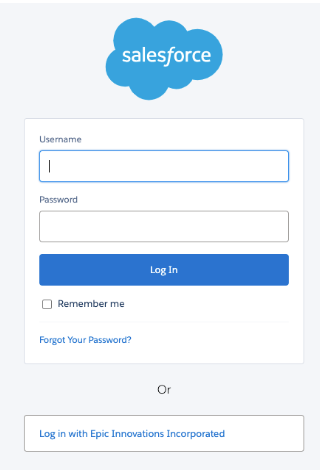
We get an insufficient privileges error because the Epic Innovations organization doesn’t have any open cases of type Classified. So, our application handler denies access to the Secure Ops organization.

Now, let’s create a case and set the type to be Classified. Since we don’t have any other automation, the case is automatically assigned to our user. We can now try to access the Secure Ops org.
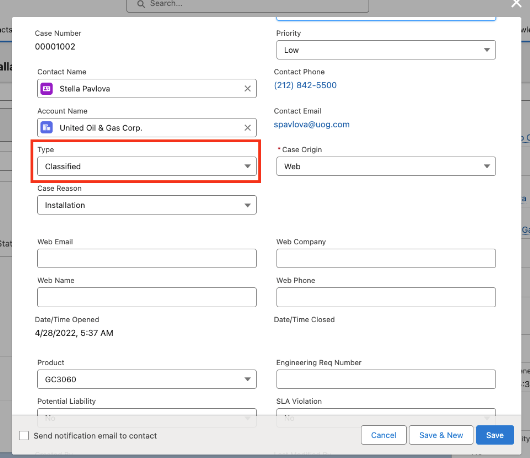
If we attempt the same process, we can log in to the Secure Ops org.
Contact us to explore our services and discover how our extensive knowledge at Oktana can assist you in launching a successful project.


