Salesforce Mobile SDK is a development kit powered for developers to natively produce mobile apps for iOS using Swift, and for Android, using Java and Kotlin. These applications can also use hybrid technologies such as React Native, which uses TypeScript and JavaScript.
After the development stage ends, the app can be published independently in the App Store or Google Play Store. Mobile SDK provides its users a base for creating custom mobile applications. This base allows developers to pre-configure the requirements needed to connect an app to the Salesforce org, and then securely access the information within that org.

Salesforce Mobile SDK Tools
- Update data from the org in real-time
- Offline data synchronization through mobile sync and smart store
- Consumption of rest API through the mobile app
- SSO authentication for the mobile app for secure enablement

Setting up the Development Environment
To get started, you’ll need to have Node.js (version 16.7) installed, this version in particular works well with the tools provided by Salesforce. Additionally, you will need GIT.
For iOS, you will be required Xcode, Cocoapods (in their latest version), and forceios.
For Android, it is required Java (JDK 11), Android Studio, or IntelliJfor the developer ID and forcedroid.
If you create this app using React Native and Typescript to generate a cross-platform app that can be used for iOS and Android, you have to meet the two previous requirements. Be sure to install the typescript compiler. Salesforce uses Yarn as Node.js’s dependency manager since it is the tool that Salesforce uses by default, and to avoid errors, you will need to use forcereact dependency with Yarn.
Once our environment is configured, we can go to the terminal and execute the tools.

Android
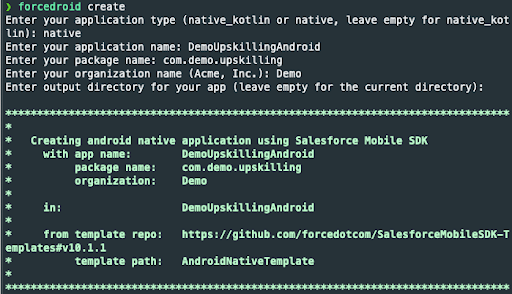
1. Run the command “forcedroid create”
2. A form on your screen will help you execute our base project.
- The first line asks us about the language we will choose for Android development (Kotlin or Java).
- In the following lines, the questionnaire focuses on the configuration of the mobile application project. Such as the name of the application, the package, and the app’s organization. Once this command is executed, we will look at the status of the process of creating our project.
iOS
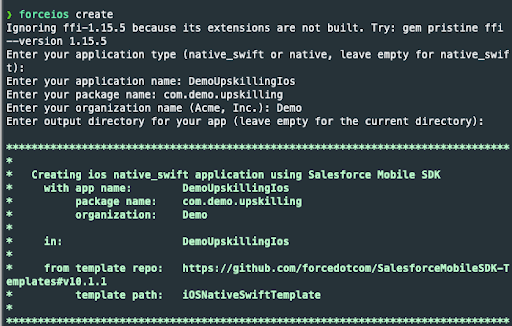
1. Run the command “forceios create”
2. A form on your screen will help you execute our base project
- For this project, we will opt for native development with Swift as the primary language in the iOS project.
- In the following lines, the questionnaire focuses on the configuration of the mobile application project. Such as the name of the application, the package, and the app’s organization. Once this command is executed, we will look at the status of the process of creating our project.
ReactNative
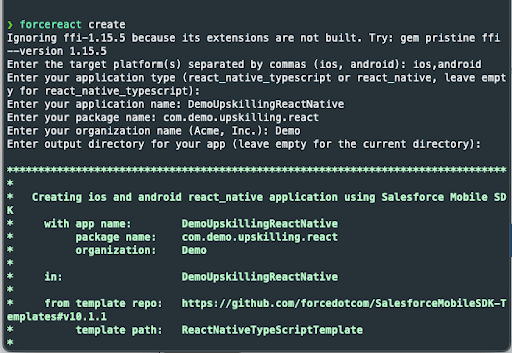
1. Run the command “forcereact create”
2. For the platform on which the React Native application will be launched, we can choose iOS or Android. If it is a cross-platform app, we will select iOS and Android.
3. For the programming language: typescript or javascript. It is essential and depends on the programmer.
4. In the following lines, the questionnaire focuses on the configuration of the mobile application project. Such as the name of the application, the package, and the app’s organization. Once this command is executed, we will look at the status of the process of creating our project.
Connecting the Org to Your App
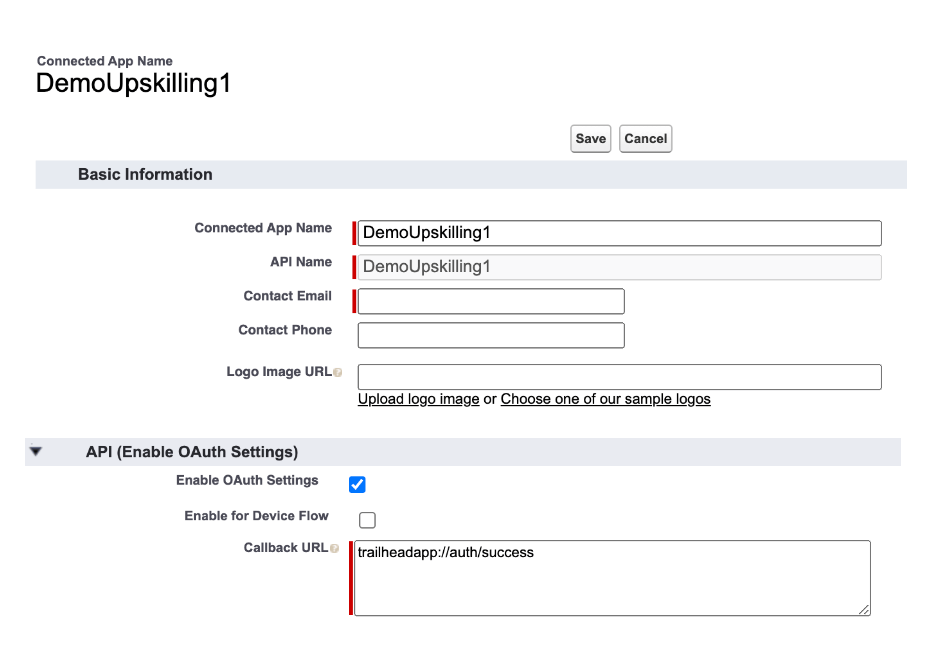
The first step would be to go to the “Connected Apps” section (a third-party application allowing our mobile application to communicate with our Salesforce org). Here, we will need to create a new Salesforce org and complete the following form:
1. Basic Information: Complete the Contact App Name, the API Name, Contact Email.
2. API:
- Enable OAUTH Settings
- Call Back URL: The first part is a prefix; Salesforce tells us that nothing is exactly established, since here we can choose to write any prefix. For example, “trailhead app” what matters is that this prefix matches the name that we have configured in our project. The suffix has to stay the same.
3. Select Scopes: these are the permissions that we will give to our third-party application, which will have to access our org; here we need 3. These permissions will allow our mobile application to access the data or records found in our org, as well as user information, and above all, have the data of the org offline.
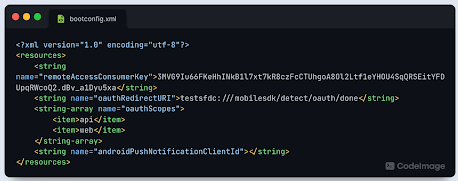
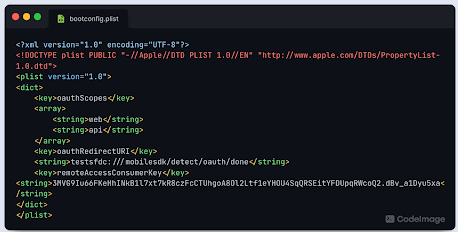
Once the Connected App has been created, you will need the configuration files where we will insert the key given by Salesforce for our Connected App.
Android
In the case of an Android project, we will have to edit the “bootconfig.xml” file and modify the ConsumerKey and Connected URL, both of which will be replaced by those created in the Connect App.
iOS
In the case of the iOS project, we will have to edit the “bootconfig.plist” file and replace the same Connected URL and Consumer Key fields.
Uriel, one of our developers in Bolivia, has recently given a workshop about this topic. We strongly suggest you watch the demo video if you’re interested in learning more and implementing these concepts. You will find a comprehensive demo of how to connect the app and a use case.


