In today’s data-driven world, efficient data management and seamless platform integration are paramount. This article will walk you through the step-by-step process of configuring Salesforce and AWS S3 to work in harmony. This will enable industry professionals to create, read, update, and delete objects with ease, ensuring smooth data operations and enhanced productivity.
AWS Configuration
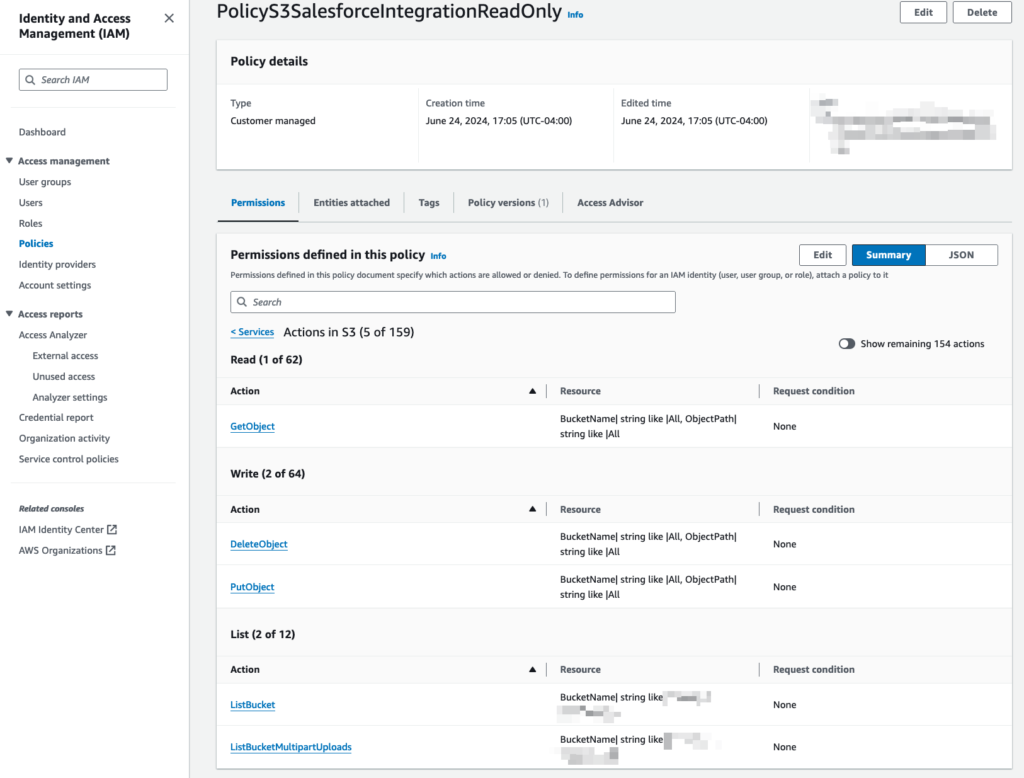
Creating AWS S3 Policy
1. Log in to AWS Console.
2. Navigate to IAM (use the search bar).
3. Click on Policies (on the left side of the screen).
4. Click on Create policy.
5. Click Choose a service then select S3.
6. Provide the following permissions under:
- Read Section: GetObject
- Write Section: DeleteObject and PutObject
- List Section: ListBucket and ListBucketMultipartUploads
7. Then in the Resources section click on Add ARN next to “bucket”.
- Bucket Name: bucket-s3-<your initials>-<favorite animal>
- Check Any checkbox for Object Name.
8. Enter PolicyS3SalesforceIntegrationReadOnly as a name for the new policy.
9. Click Create Policy.
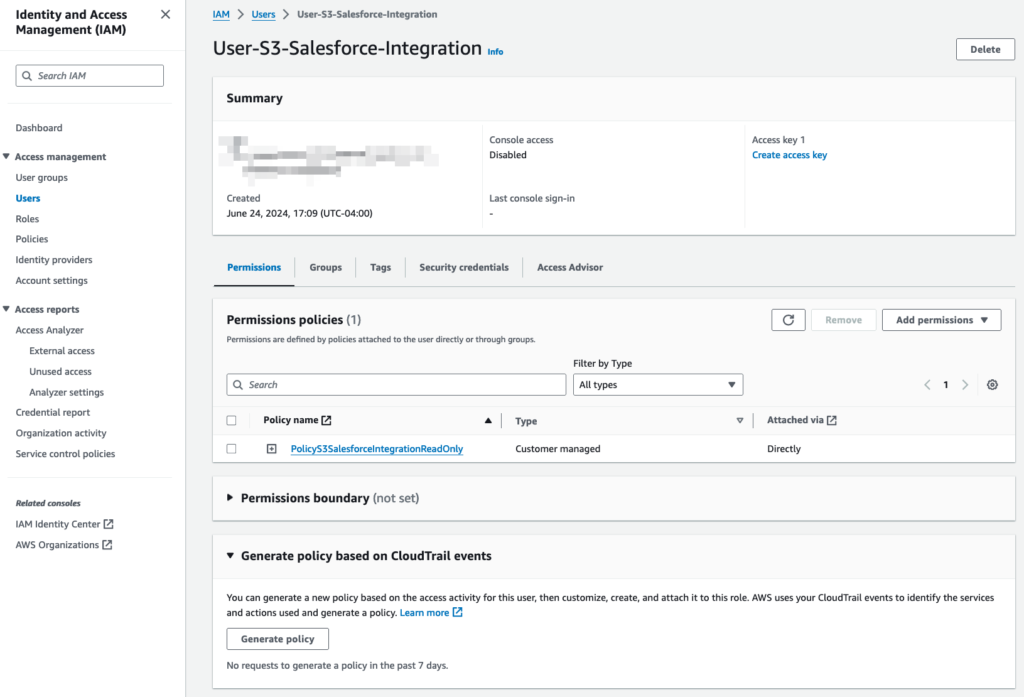
Creating AWS S3 User
1. Click on Users (on the left side of the screen).
2. Click on Create user.
3. Type User-S3-Salesforce-Integration in the Name field then click Next.
4. Click Attach policies directly.
5. Select the PolicyS3SalesforceIntegrationReadOnly policy to add.
6. Click Next and review the Summary Details.
7. Click Create User.
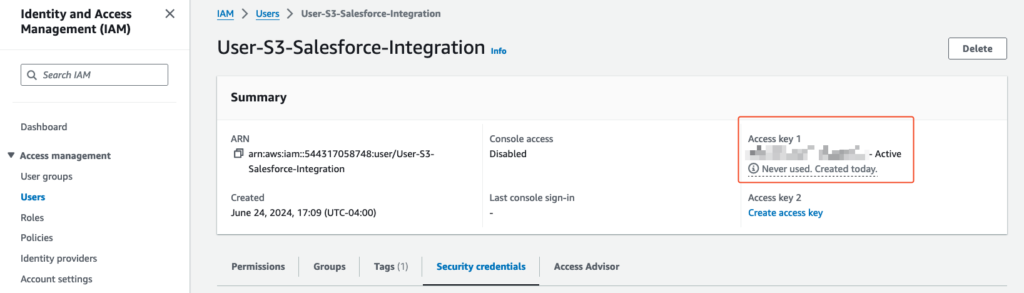
Generating AWS IAM User Access & Secret Key
1. Click on Users (on the left side of the screen).
2. Open the recently created user User-S3-Salesforce-Integration.
3. Click on the Security Credentials tab.
4. Click on Create access key (top right of the screen).
5. Select Other then click Next.
6. Provide Key-S3-Salesforce-Integration_<CurrentYear>_<CurrentMonth> as a description.
7. Click Create access key.
8. Click on Download .csv file.
9. Securely store the keys, they will be used at a later point in this guide.
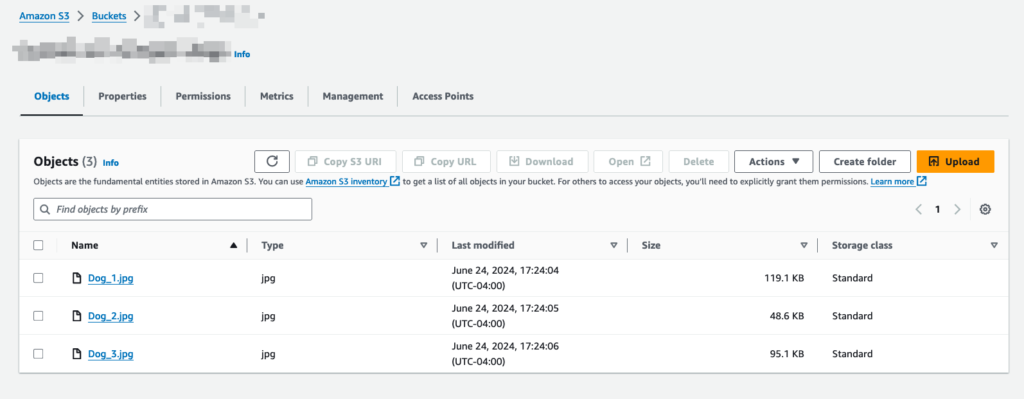
Creating AWS S3 Bucket & Objects
1. Navigate to S3 (use the search bar).
2. Click on Create bucket.
3. Provide the following as bucket name: bucket-s3-<your name initials>-<favorite animal>
Note: Use the same bucket name provided while creating the IAM Policy.
4. Click on Create bucket.
5. Open the newly created bucket.
6. Upload a couple of files or images.
Salesforce Configuration
Storing AWS S3 Access & Secret Key in Salesforce
1. Log in to Salesforce (Trailhead Playground or Salesforce Developer Org).
2. Navigate to Setup > Named Credentials then click on External Credentials tab.
3. Click on New.
4. Provide the following information:
- Label: AWS S3 Credential
- Name: AWS_S3_Credential
- Authentication Protocol: AWS Signature Version 4
- Service: s3
- Region: us-east-1 (or the one where you created the s3 bucket)
- AWS Account ID: <your AWS account ID>
5. Click Save.
6. Click New on the Principals section.
7. Provide the following information:
- Parameter Name: AWS S3 Principal
- Sequence Number: 1
- Access Key: generated in AWS IAM
- Access Secret: generated in AWS IAM
8. Go back to the Named Credentials tab.
9. Click on New.
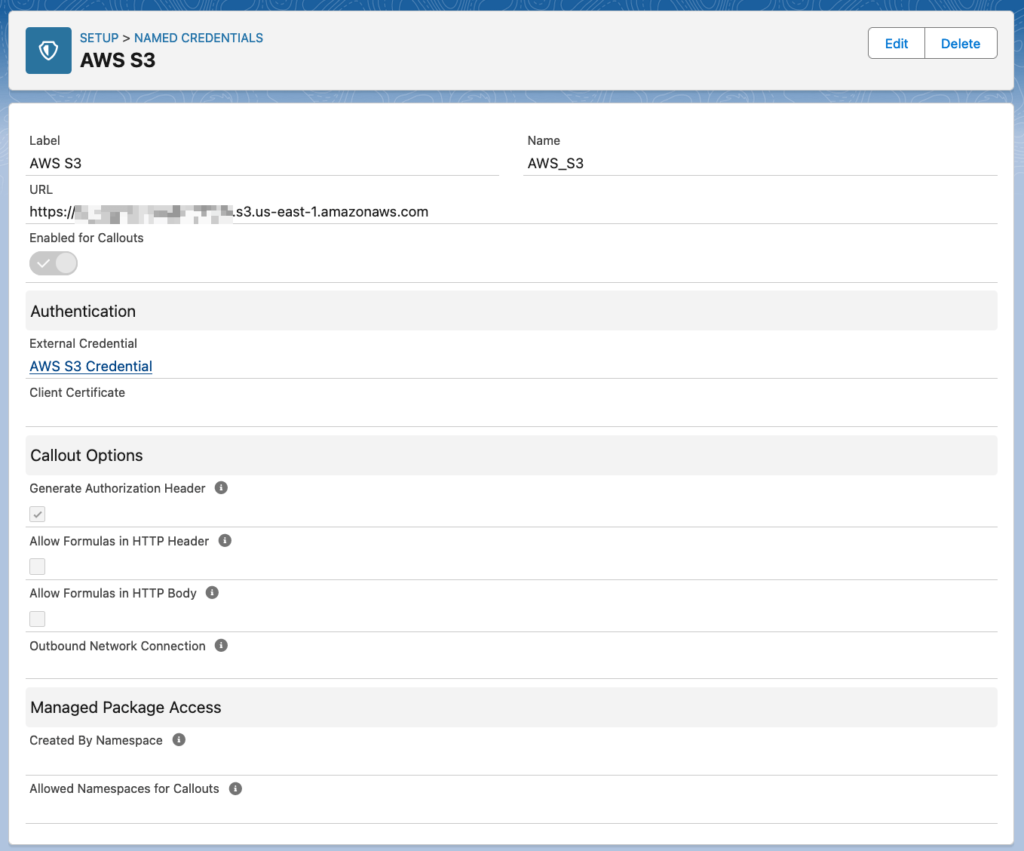
10. Provide the following information:
- Label: AWS S3
- Name: AWS_S3
- URL: https://<your-bucket-name>.s3.<your-bucket-region>.amazonaws.com
- Enabled for Callouts: Yes
- External Credential: AWS S3 Credential
- Generate Authorization Header: Checked
11. Click Save.

Providing access to Credentials in Salesforce
1. Navigate to Setup > Permission Sets.
2. Click on New.
3. Provide the following information:
- Label: AWS S3 User
- API Name: AWS_S3_User
4. Click Save.
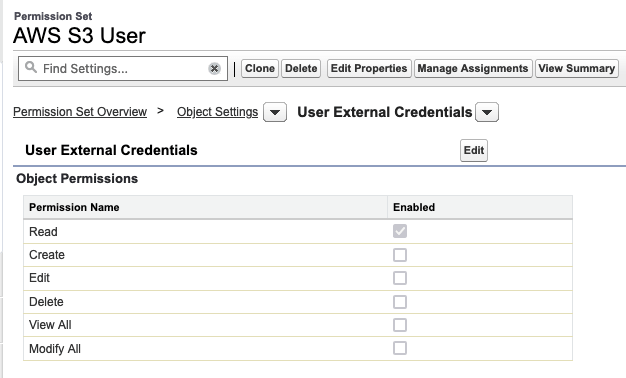
5. Click on Object Settings.
6. Search for and open User External Credentials then click on Edit.
7. Provide Read access.
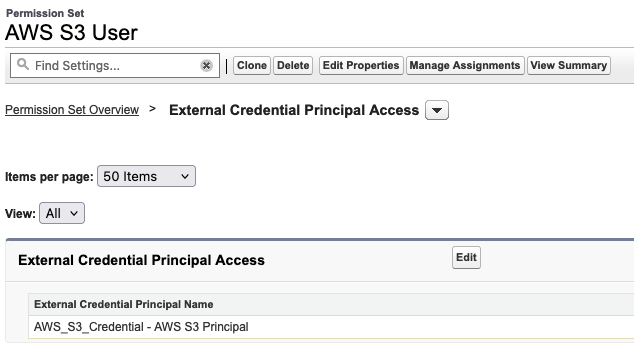
8. Go back to Permission Set Overview and click on External Credential Principal Access.
9. Add the AWS_S3_Credential – AWS S3 Principal.
10. Assign the Permission Set to the user that you would like to provide access.
Testing Integration
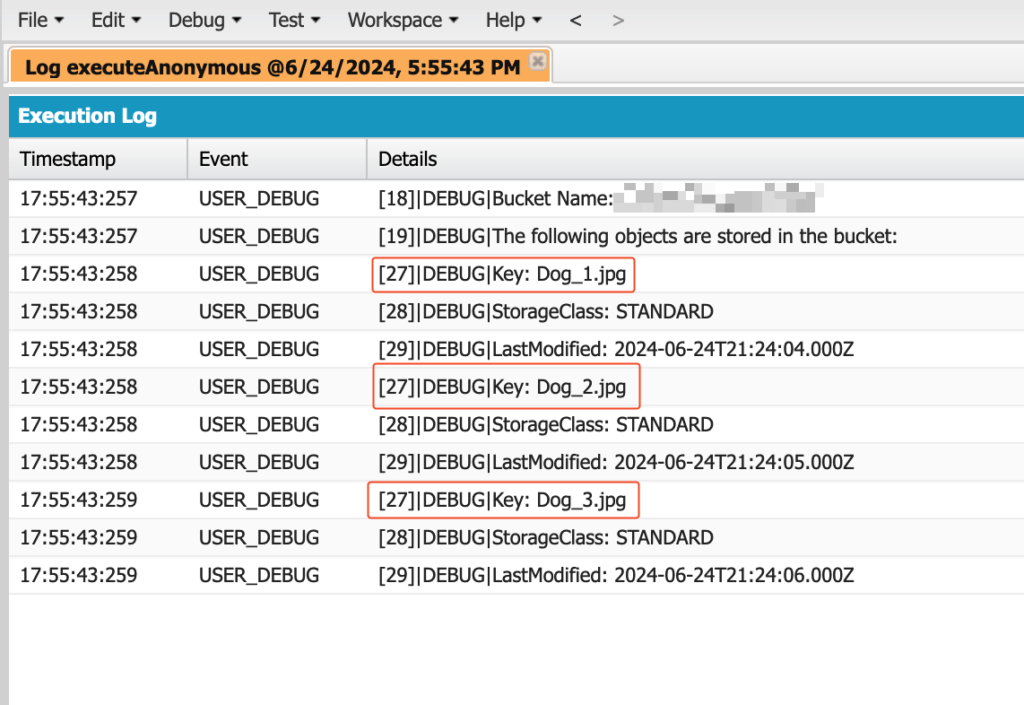
Listing Bucket Objects
This code retrieves all objects stored in the S3 bucket using an HTTP GET request to the S3 endpoint.
					HttpRequest request = new HttpRequest();
request.setMethod('GET');
request.setEndpoint('callout:AWS_S3' + '/');
Http http = new Http();
HttpResponse res = http.send(request);

//Checkpoint
Assert.areEqual(200,res.getStatusCode());

//The following section processes the XML result and formats the data for better readability.
String namespace = 'http://s3.amazonaws.com/doc/2006-03-01/';
Dom.Document doc = res.getBodyDocument();
Dom.XMLNode root = doc.getRootElement();

String bucketName = root.getChildElement('Name', namespace).getText();

System.debug('Bucket Name: ' + bucketName);
System.debug('The following objects are stored in the bucket: ');

for (Dom.XMLNode node : root.getChildElements()) {
	if (node.getName() == 'Contents' && node.getNamespace() == namespace) {
    	String key = node.getChildElement('Key', namespace).getText();
    	String lastModified = node.getChildElement('LastModified', namespace).getText();
    	String storageClass = node.getChildElement('StorageClass', namespace).getText();

    	System.debug('Key: ' + key);
    	System.debug('StorageClass: ' + storageClass);
    	System.debug('LastModified: ' + lastModified);
    }
}
Adding Objects
This code uploads a text file to the S3 bucket using an HTTP PUT request, with the file content included in the request body.
Note: If you want to upload binary data, you can use setBodyAsBlob(…) instead of setBody(…).
					String fileNameToCreate = 'BytesInTheCloud.txt';
String fileContent = 'Greetings from the cloud! Your data is safe and sound in S3.';

HttpRequest request = new HttpRequest();
request.setMethod('PUT');
request.setBody(fileContent);
request.setEndpoint('callout:AWS_S3/' + fileNameToCreate);

Http http = new Http();
HttpResponse res = http.send(request);

//Checkpoint
Assert.areEqual(200,res.getStatusCode());
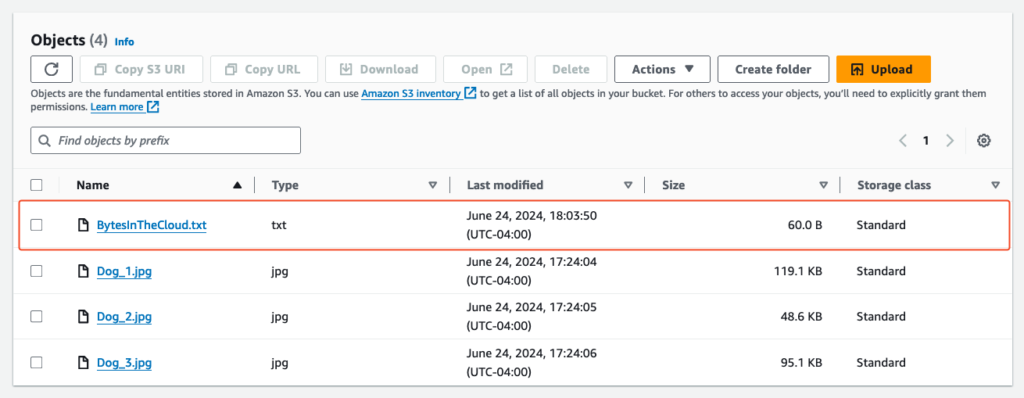
As you can see in the screenshot below, the BytesInTheCloud.txt file has been added.

Updating Objects
This code updates the content of an existing file in the S3 bucket using an HTTP PUT request with the new content in the request body.
					String fileNameToUpdate = 'BytesInTheCloud.txt';
String fileNewContent = 'Data update complete! Your bytes are now even more awesome.';

HttpRequest request = new HttpRequest();
request.setMethod('PUT');
request.setBody(fileNewContent);
request.setEndpoint('callout:AWS_S3/' + fileNameToUpdate);

Http http = new Http();
HttpResponse res = http.send(request);

//Checkpoint
Assert.areEqual(200,res.getStatusCode());
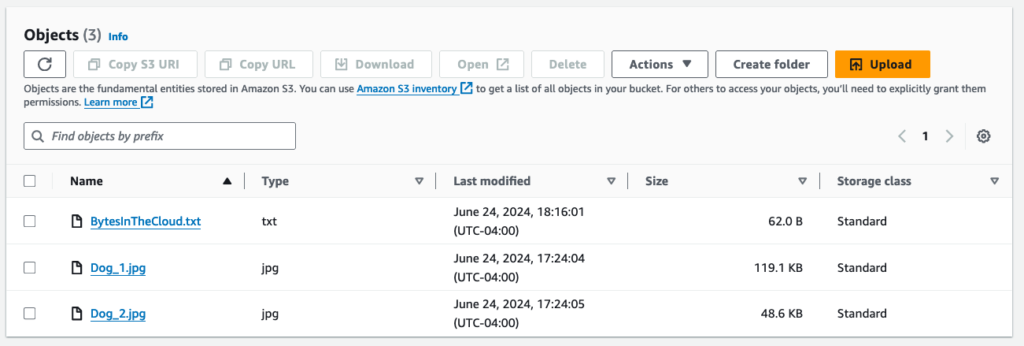
As you can see in the screenshot below, the BytesInTheCloud.txt file has been updated.
Deleting Object
This code deletes a specified file from the S3 bucket using an HTTP DELETE request. As you can see in the screenshot below, the Dog_3.jpg file has been deleted.
					String fileNameToDelete = 'Dog_3.jpg';

HttpRequest request = new HttpRequest();
request.setMethod('DELETE');
request.setEndpoint('callout:AWS_S3/' + fileNameToDelete);

Http http = new Http();
HttpResponse res = http.send(request);

//Checkpoint
Assert.areEqual(204,res.getStatusCode());
As you can see in the screenshot below, the Dog_3.jpg file has been deleted.
Conclusion
Integrating AWS S3 with Salesforce brings together two powerful platforms, enabling efficient and streamlined data management. By following the steps outlined in this article, you’ve successfully configured AWS and Salesforce, securely stored and accessed credentials, and tested the integration by performing various object operations. This seamless integration not only simplifies your data management tasks but also opens up new possibilities for automating and enhancing your workflows.
As you continue to explore and expand on this integration, you’ll find numerous ways to optimize your processes, improve data accessibility, and boost overall productivity. Remember, the key to successful integration lies in thorough testing and continuous learning. Embrace the power of Salesforce and AWS S3. Happy integrating!
FAQ
How do I find my bucket region?
- Navigate to the S3 console.
- Select your bucket.
- The region is displayed in the bucket details.
How do I find my AWS account Id?
- Go to the AWS Management Console.
- Click on your account name (top right corner).
- Copy the Account ID.
How do I assign a Permission Set to my user?
- Log in to Salesforce.
- Go to Setup > Permission Sets.
- Select the desired Permission Set.
- Click Manage Assignments.
- Click Add Assignments and select the user(s) you want to assign the Permission Set to.
- Click Assign.