Can we create a fully functional conversational bot that leverages the power of a Large Language Model (LLM)? The answer is a resounding yes!
In this post, we’ll guide you through the process of building a robust and interactive conversational bot from scratch. If you have a fresh OpenAI account, it’s possible to utilize 100% free accounts and software since OpenAI gives us $15 of credit to try it. If not, you must add credits to your OpenAI account, but it’s inexpensive for this sample app.
We’ll use MuleSoft, Slack, and the state-of-the-art ChatGPT to make it happen. Unlike traditional NLP systems, ChatGPT is an LLM designed to understand and generate human-like text. This makes it extremely useful for various language-processing tasks.
So, buckle up and join us as we reveal the secrets to creating an intelligent bot that leverages the advanced capabilities of ChatGPT, an LLM that can enhance team collaboration and productivity, and deliver a seamless user experience. Let’s dive in!
Note: The accounts and software used in this post could have some limitations since MuleSoft gives us trial accounts.
The main purpose it’s that you understand and learn the basics about:
- Implementation of OpenAI REST API (we’ll be using ChatGPT-3.5-turbo model)
- How to create a simple backend integration with Anypoint Studio.
- How to realize an integration with Slack.
Pre-requirements
- Anypoint Studio’s latest version.
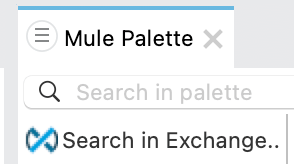
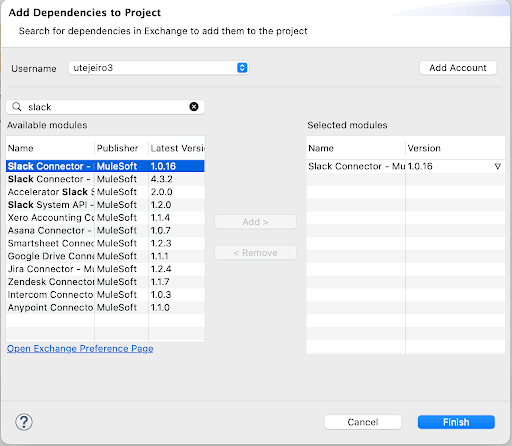
- Once you installed Anypoint Studio and created a new Mule Project, we need to install the Slack Connector, you just need to access the Anypoint Exchange tab, and then you will be able to search for and install the connector.
- Anypoint Platform trial account, you can create a 30 days trial account.
- A Slack Bot installed on a Channel.
- An OpenAI account with available credit. Remember, OpenAI gives us $15 if it’s your first account. If you previously registered on the OpenAI platform, then you will need to add a balance to your account. However, following this guide and creating your sample application, will be really cheap.
Once we have everything installed and configured, we can proceed with getting the corresponding authorization tokens that we will need along with our integration. Save these in your mule-properties .yaml file.
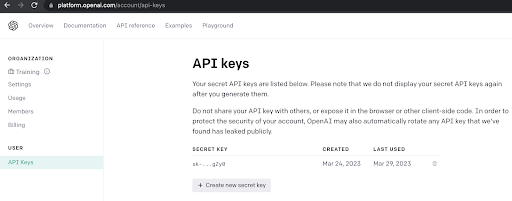
OpenAI API Key
Once you have created your account on OpenAI, you will be able to access your account dashboard, where you will see a tab labeled “API Keys”. Here, you can generate your secret key to make requests to the OpenAI API. Simply click on “Create new secret key”, copy the key, and save it to a text file.
Slack Oauth
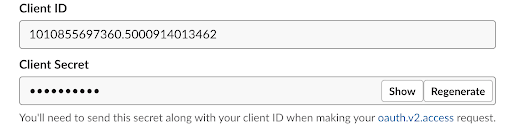
On your Slack application, you should have already configured your bot inside a channel on Slack. If you don’t know how to do it, you can follow this guide. On Bot’s scope configuration, enable ‘channels:read’, ‘chat:write:bot’, and ‘channels:history’.
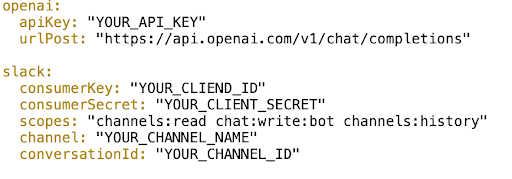
This screenshot it’s an example of how looks the interface, you will have your own client ID and Client Secret:
Configuration properties of a Conversational Bot
You can use this sample file for your mule-properties .yaml file, you just need to replace your own KEYS and IDs.
The Integration
Now that we have our Bot created in Slack, and our API Key on the OpenAI dashboard, you start getting an idea about the roles of each system and which is the missing piece that connects them all, that’s right, it’s MuleSoft’s Anypoint Platform.
The Project Structure
The project is divided into a main flow, and 3 flows, divided according to functionality. We need to do some things between receiving and replying to a message from a user on Slack. Please see the image below, and each block’s explanation.
Main Flow
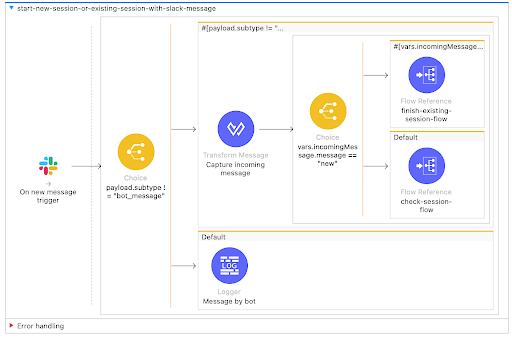
- This Mule flow listens for new messages in a Slack channel using the slack:on-new-message-trigger component. The channel is specified using the ${slack.conversationId} property. A scheduling strategy is set to run the flow every 5 seconds using the fixed-frequency component.
- Next, the flow checks if the message received is from a user and not from the bot itself. If the message is from the bot, the flow logs a message saying that it is the bot.
- The incoming message is then transformed using the DataWeave expression in the Transform Message component. The transformed message is stored in the incomingMessage variable, which contains the user, timestamp, and message text.
- If the message is from a user, the incomingMessage.message is checked to see if it equals “new”. If it does, the finish-existing-session-flow is invoked using the flow-ref component. If it doesn’t equal “new”, the check-session-flow is invoked with the target set to incomingMessage.
Overall, this flow handles incoming messages in a Slack channel and uses choice components to determine how to process the message based on its content and source.
The finish-existing-session-flow and check-session-flow are likely other flows in the application that handle the logic for finishing existing sessions or checking if a new session needs to be started.
Finish existing session flow
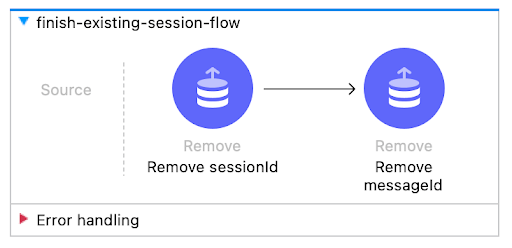
- “Finish-existing-session-flow”: terminates the previous session created by the user.
Check session flow

This flow called “check-session-flow” checks if a user has an existing session or not, and if not, it creates one for the user. The flow follows the following steps:
- Check if a user has an existing session: This step checks if the user has an existing session by looking up the user’s ID in an object store called “tokenStore”.
- Check array messages user: This step checks the object store “store_messages_user” to see if there are any messages stored for the user.
- Choice Payload: This step uses a choice component to check if the payload returned from step 1 is true or not.
- When Payload is true: If the payload from step 1 is true, this step retrieves the existing session ID from the “tokenStore” object store and sets it as a variable called “sessionId”. It also retrieves any messages stored for the user from the “store_messages_user” object store and sets them as a variable called “messageId”. Finally, it logs the “messageId” variable.
- Otherwise: If the payload from step 1 is not true, this step sets a welcome message to the user and stores it in the “store_messages_user” object store. It generates a new session ID and stores it in the “tokenStore” object store. Finally, it sets the “sessionId” variable and generates a welcome message for the user in Slack format.
- At the end of the flow is where we interact with OpenAI API, calling a flow named “make-openai-request-flow”.
The steps in this flow ensure that a user’s session is properly handled and that messages are stored and retrieved correctly.
Make OpenAI request flow

The purpose of this flow is to take a user’s message from Slack, send it to OpenAI’s API for processing, and then return the response to the user via Slack. The flow can be broken down into the following steps:
- Transform the user’s message into a format that can be sent to OpenAI’s API. This transformation is done using DataWeave language in the “Transform Message” component. The transformed payload includes the user’s message, as well as additional data such as the OpenAI API model to use, and a default message to send if there is an error.
- Log the transformed payload using the “Logger” component. (Optional, was used to check if the payload was loaded correctly)
- Send an HTTP request to OpenAI’s API using the “Request to ChatGPT” component. This component includes the OpenAI API key as an HTTP header.
- Store the user’s message and OpenAI’s response in an object store using the “Store message user” component. This allows the application to retrieve the conversation history later. (please read more about this on OpenAI documentation. This will help to keep the conversation context that a user has with ChatGPT since messages are stored with roles: “user” and “assistant”.).
- Transform the OpenAI response into a format that can be sent to Slack using the “Make JSON to send through Slack” component. This component creates a JSON payload that includes the user’s original message, the OpenAI response, and formatting information for Slack.
- Send the Slack payload as an ephemeral message to the user using the “send answer from chatGPT to Slack” component.
- As the final step, we delete the original message sent by the user, as we are using ‘Ephemeral messages’, since the Bot is deployed on a channel, the messages are public, with ‘Ephemeral messages’ we can improve the privacy on the messages sent on the Slack channel.
- Create a payload to delete the original message from Slack using the “payload to delete sent messages” component.
- Send a request to delete the original message from Slack using the “delete sent message” component.
By following these steps, the MuleSoft application can take a user’s message from Slack, send it to OpenAI’s API, and return the response to the user via Slack, while also storing the conversation history for later use.
This was created and tested with these versions:
Mule Runtime v4.4.0
Anypoint Studio v7.14
Slack Connector v1.0.16